Categories
Uncategorized

3D Printing (on fabric!)

bumps-on-fabric-0921a

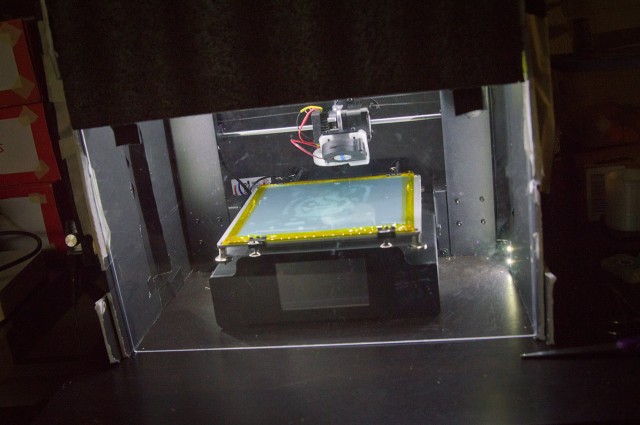
I finally got around to 3D printing on fabric. It worked out okay. I need to experiment a bit more to perfect it, but for a first attempt, it worked out okay.

bumps

I used OpenSCAD to design a bump, and then made a field of bumps. (It’s a low-poly half sphere, actually. Really simple to do in OpenSCAD.)

bumps-openscad

Also really easy to generate a bunch of them in OpenSCAD by using two for loops. I know OpenSCAD isn’t for everyone, but if you think in code, it might work for you.

bumps-on-fabric-0923a

I used this organza fabric to print onto. It’s a mesh material, so the process of printing on it involves printing a few layers, then pausing the print, moving the print head out of the way, laying down the fabric, securing it to the bed, then continuing the print. The fabric gets embedded within the layers of the print.

cura-script-custom

My Maker Select Plus did not allow me to pause the print and move the extruder using the on screen controls, so I added some custom gcode to my print. Cura has a post-processing plugin that allows you to inject gcode bits into your script. I had make an edit to get it to work with my printer. And then I actually made my own version so I don’t lost the changes when I upgrade Cura next time.

bumps-on-fabric-0917a

So what use is this? It allows you to wrap a print around something. It an be used to create fake armor for cosplay, or to wrap anything cylindrical, or add an interesting texture to something. Over at Milwaukee Makerspace we may have something in the works for Maker Faire Milwaukee this year.

A post shared by Pete Prodoehl (@raster) on

Stay Tuned!

Categories
Uncategorized

RepRap Report #6

diii-cooler-0906

It’s been a while so it’s time for another RepRap Report! So what’s changed since last time? So much… I’ll try to hit it all.

I got rid of the BuildTak and moved to a PEI Sheet. I upgraded to the Micro Swiss All Metal Hotend which made printing ABS reliable once again.

I repaired fans, I replaced fans. And then I did it again. Once I got ABS printing up to speed I printed a DiiiCooler, which I finally installed, and still haven’t used (since I’m printing ABS at the moment.) And yeah, I’m waiting for some new extruder fans to arrive after last night’s hurried soldering session to repair another bad fan.

printer-enclosure-0904

If all of this seems silly, well, in a way it is, and it isn’t. When you buy a thing (be it a 3D printer or a car) you can go cheap knowing that things might break or need upgrades, or you can pay a lot more for quality out of the gate, with the hope that things don’t go wrong or are of a higher quality. I knew that getting the Monoprice Maker Select Plus meant compromising so I could afford a printer (which was replacing my old RepRap Prusa i2 kit from 2011) and I was fine with that. There are many routes you can go with a printer. I’m going the “cheap” route right now, I’ve got friends who work for the “expensive but reliable route” companies, and then there’s the custom build route. They’re all legit choices.

enclosure-lights-0905

Oh, I don’t think I ever mentioned my enclosure. It’s built from foamcore board and covered with the packing foam that the printer came in. The front window is a piece of Polycarb I got from Amazon. It works. It’s not pretty. That’s okay. Besides keeping the heat in, it keeps the cats out. Also important. I also added a set of 12 volt LED lights with an on/off/dimmer switch.

led-dimmer-0913

If I had to build an enclosure again (and I might need to soon) I’d probably go with foamcore again, but take some effort to make it look good this time.

filament-rod-0916

I still feed the filament from a metal rod hanging above my printer in the basement. It works fine. It’s not portable, and that’s probably okay. The drybox I was working on failed, and I haven’t had the energy to revisit that project. That’s okay for now.

Besides all that, I’ve been just printing things. Nothing too exciting, but that may change soon. Happy Extruding!

Categories
Uncategorized

Brinn Labs Hexalight

DSC32E_0643

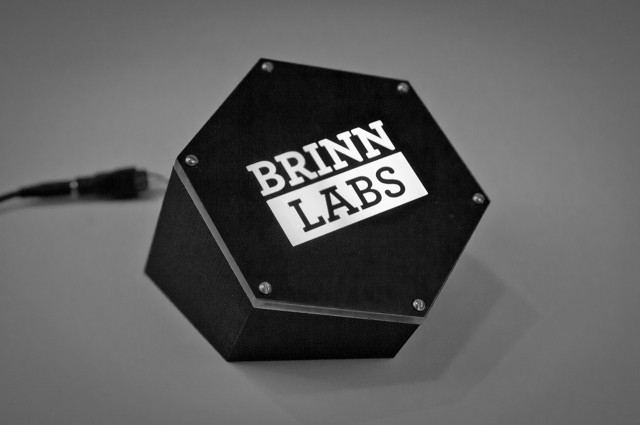
I’ve been messing around with NeoPixels quite a bit lately, and I wanted a small portable light I could use to show off a few “makery” things. So the Brinn Labs Hexalight was created.

DSC32E_0630

It consists of a 3D printed base made from black PLA filament. It was close to a ten hour print, one of the longest I’ve done on my Monoprice Maker Select Plus 3D printer. It turned out well. There’s also a piece of laser cut Acrylic for the top…

DSC32E_0605

DSC32E_0617

DSC32E_0586

I only had clear Acrylic handy, and I experimented with a few ideas for light diffusion (including sanding the backside of the Acrylic, and using some HDPE from a milk jug) but in the end I just left the protective backing sheet that comes on the Acrylic in place. (There’s one small tear in it, though next time if I do this I’ll be more careful ahead of time since I’ll have a plan in place.)

DSC32E_0585

Some slotted pan head screws hold the top in place. I would have preferred some nice hex hardware (obviously!) but didn’t have any on hand, and wanted to complete this build quickly. (Maybe I’ll change it out in the future.)

DSC32E_0579

There’s a piece of scrap wood inside that holds the NeoPixels in place. The wood is not laser cut, but hacked up using a band saw. It’s “good enough” for a hidden piece. (Sometimes I work on projects in multiple places and have to use whatever tools are available at the time.)

The three strips of three NeoPixels each is about what I could fit inside. The strips run in parallel, so there’s not a lot pixels to work with. It also makes the transitions not super-smooth, though I still need to play with the code a bit more.

DSC32E_0583

Here’s a shot of the inside from the back/bottom. It’s messy. There’s an ATtiny85 on a board I’ve used before. This allows for the chip to be removed and reprogrammed. Yes, you can skip an Arduino and use an ATtiny85 for small simple NeoPixel projects. (And still program them with the Arduino IDE.)

DSC32E_0584

There’s a pair of wires that lead out a channel in the back/bottom and go to a barrel jack connector. I can then power it with a 5 volt power supply, either from a wall wart or a USB battery.

DSC32E_0646

BLHexalight v01C

I modeled the 3D printed part in OpenSCAD. It’s easy to make hexagons, and I just added a large squarish hole in the middle for the electronics.

BLHexalight v01B

The red piece is a block I used to do the boolean difference for the main piece. This allowed me to slice the hexagon at a specific angle so I could just end up with the part I wanted.

BLHexalight v01A

Here’s a view of the final piece viewed from the front. You can also see the little “shelf” I made for the piece of wood holding the NeoPixels to fit onto.

BLHexalight v01D

Here’s the model from the bottom. There’s the channel for the power wires to run out of. This was just another boolean difference with a cylinder this time to create a half circle channel.

bl-hex-vinyl

I used the Silhouette Cameo to cut a piece of black vinyl to put on the front so the logo could light up. Getting the vinyl perfectly aligned was a little tricky, so next time I might try another method. (Or just do a better job.)

DSC32E_0644

Categories
Uncategorized

Big Switch Little Light

big-switch-little-light-0523

This project started like many of my projects… Someone says something, and I have a reaction to it. I might say something, or I might not say anything, but I’ll get an idea, and decide to do something. Sometimes it’s a ridiculous idea, and that doesn’t really matter. In fact, ridiculous ideas are probably more likely to be explored.

big-switch-little-light-0546

This one started when a local teacher got in touch with Milwaukee Makerspace about donating a bunch of industrial control equipment. Luckily Tom and a few other members were interested enough to go look through nine boxes and transport them back to the space so members could look through them. I should note this is a common thing. When people want to get rid of things we look for a “Champion”. Basically someone who will take responsibility for the stuff. If they bring it to the space we ask that whatever members don’t take “goes away” within a week or so. (Typically this means the dumpster, but not always. At a minimum, some members take some things and divert them from the landfill. Sometimes things are donated to others or recycled.)

big-switch-little-light-0562

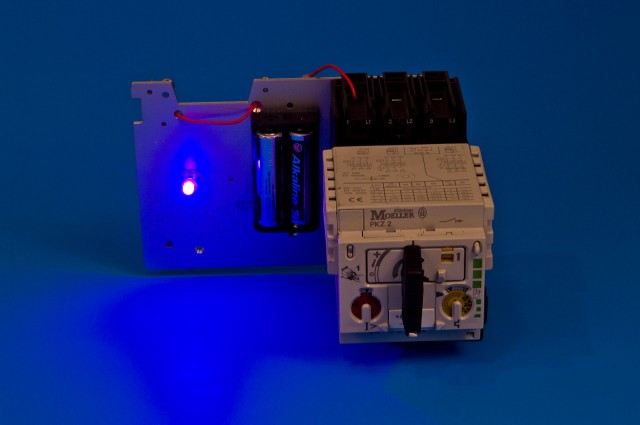
This load was a bunch of industrial electronics. Not super useful for most of our members, but many did find some good things. I found some neat switches, and in particular this large switch with a nick “CLUNK!” sound that said it was capable of handling 690 volts…

big-switch-little-light-0540

Steve and I were looking at it as I clicked it on and off and I mentioned how many volts it could handle and he said “Hey, you need to make it turn on an LED!” which was (probably) a joke, since an LED requires roughly 3 volts, which is quite a bit less than 690 volts. (In fact, it’s approximately 687 volts less!)

big-switch-little-light-0548

So I did what I had to do… I had to assemble the switch into a device that could turn on (and off) and LED. I had also found (and destroyed) an old data tape, but I managed to save the nice Aluminum plate that served as the base of the data tape. (Seriously, some of those old tapes were sort of beautiful!) Since I now had to weird objects, I just combined them with some wire, an LED, and LED panel mount, a battery holder, and two AA batteries. The rest is… history!?

big-switch-little-light-0544

There’s also a Sintra plate on the bottom that the battery holder screws into to hold it in place. And some tape, and some hot glue. (It’s not a project until you add the hot glue!)

big-switch-little-light-056A

So yeah, it’s a but ridiculous, but it’s also somewhat interesting. In some of my projects I don’t even add a switch. This actually seems very common in “maker” projects. Why add a switch when you can just apply and cut power by plugging a thing in!? So why not make the switch the BIG THING in the project. Many times larger than the batteries and the thing you’re actually turning on. Hell, it’s almost art!

Because the switch sounds so amazing, I had to make a video. Oh, also you can see the LED turn on, so there’s no trickery in this video.

Also, worse case, if I keep this thing around I’ll have a nice big high voltage rated switch I can cannibalize for another project. So that’s a big win in my book.

(Oh, sorry about the terrible photos of the blue LED. I need to do better next time.)

Categories
Uncategorized

Jewelry versus Objects (and art something)

green-button-box

I tend to make objects. Things. Pieces. Sometimes I think I can apply the word “sculpture” to them, mainly because sometimes there isn’t a better word to describe them (especially if they are to be considered “art”.)

Many of the things I make are “functional” in that they do a thing. But what is that thing? What does it mean to do a thing? They might make something happen, or move, or light up. The might be kinetic or reactive or interactive. They may solve a problem. They may make the world a better place. They might look pleasing.

And then there’s jewelry…

I’ve had a strange relationship with jewelry. I never really cared for jewelry. Beyond the relationship humans have with jewelry, and how it fits into society, I just never really cared about making jewelry. I think that some art instructors use jewelry making as a way to teach process and making, and maybe use it because many (most?) people like it and would like to have jewelry, or maybe because it’s such a personal thing. I mean, it’s work on the body. That’s personal, right?

ring-vise

I even ended up making a piece of jewelry for a class titled “Machines that Make”. I designed a hammer ring. I learned a bit more about Rhino, and I got a print made by Shapeways, which was a good experience, but as far as a piece of jewelry, I didn’t care about it. (I mean, It’s an interesting object, but I’m not going to wear it. Like many of the things I make, there’s humor somewhere deep inside of it. Or maybe on the surface. I don’t know, I’m still figuring this out.)

Much of my art & design background involved 2D work, which, let’s be honest, often hangs on a wall, or is just seen and doesn’t do a thing. But doesn’t it do a thing? Does it provoke thought or emotions? Does it instruct or inform? Does it make you feel something? Does it make you happy? Things do things.

I remember back in a high school art class we had to make a ring. I had zero interest in wearing a ring or making a ring, and I really dragged on the project. I think I eventually finished it (late) and I don’t even know what happened to it. It was a piece I just didn’t care about. I probably could have learned about etching metal, and creating different kinds of resists, but I just wasn’t invested. (I know, this is all a person thing.)

My daughter has started to make jewelry. I’m excited about it. Not because I like jewelry, but because she likes jewelry. Or, maybe she just likes making things. It seems therapeutic. She’s mostly doing wire wrapped jewelry. I use wire for electronics and for securing things. Making jewelry with it? I guess some people do that.

ring-mads

She also learned how to do metal casting, which is awesome. I know a little about metal casting, and it’s something I wish I knew more about (but there are only so many hours in the day.) I’m glad she has the opportunity to learn it.

Also, Daleks…

What? Daleks? Yeah, well, Jon H. at Milwaukee Makerspace is the Jewelry Area Champion, and besides helping people make Daleks, helps people make jewelry. Or, learn how to make jewelry. Jon is an interesting guy. I’ve heard him called a “Retired Magician” though maybe he still is a magician! He’s got a lot of skills and is willing to share them. So yeah, sometimes you see Dalek parts being made in the jewelry area, because, the process is similar, sort of. Right? I don’t know…

Where is all this going? I’m really not sure. As I said, I’ve had a complicated relationship with jewelry. I don’t wear it, I’m not a big fan. It’s a personal thing. I don’t really like drawing attention to myself. I mean, my self. My physical being. I don’t mind using words to make myself known, or sharing my work, but I don’t want the focus on my physical body. That’s just how I am. I’m weird. Maybe. I don’t know.

dalek-jewelry

Well that turned into a rambling mess about art and objects and jewelry that I wasn’t fully expecting. Writing can be like that sometimes… What do you think?