Categories
Uncategorized

Art+Tech at Var Gallery

prodoehl-noisemakers

As you may know, I’m occasionally an artist, and create weird things that I show in public. Sometimes my work appears in galleries. Typically though, my work is not in galleries in Milwaukee, so it’s a real pleasure to be in a show right in my own hometown.

Var Gallery currently has some of my work on display at the Art+Tech show, which runs until February 3rd, 2018. The majority of my work for this show (I have about nine pieces) are from my NoiseMakers series, which was also at Maker Faire Milwaukee in 2017.

art-hammer

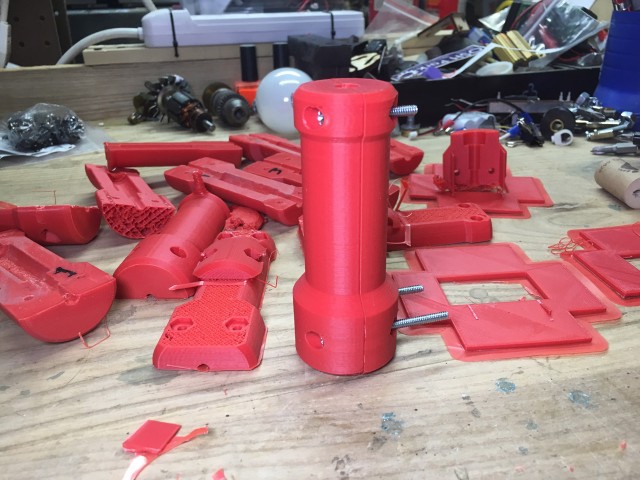
I’ve also got my Hammer of Futility at the show. (Which needed some minor repairs. Kinetic sculptures that run for weeks on end can be a challenge. I had to replace a motor, and I still need to drop in a controller to slow things down.)

becky-christina

The show was curated by Becky Yoshikane and Christina Ossers, who did a great job selecting work from Milwaukee artists involved in the Art+Tech scene. (Both are artist in their own right as well.)

Thanks to Nathaniel Stern, who I borrowed a few photos from. Also check out what Kat Kneevers had to say about the show: The Medium Becomes the Message at Var Gallery’s ‘Art + Tech’ and Jessica Fenlon’s post: Art+Tech @ VAR Gallery [Milwaukee, WI], so at least if you don’t see it, you can read about it.

If you’re a fan of Art+Tech, keep an eye out for another show coming up this spring. I can’t share any details yet, but hopefully we can keep this Milwaukee Art+Tech train kinetic sculpture moving!

Categories
Uncategorized

Events on the Big Screen

brinn-labs-events

When you enter Brinn Labs you are greeted by digital signage that shows (among other things) a calendar of upcoming events. There’s a TV with a Raspberry Pi attached running Screenly OSE. This is somewhat similar to the MMPIS I created at Milwaukee Makerspace.

Compared to the MMPIS doing this upcoming events list was quite a bit easier! For Milwaukee Makerspace the data is pulled from a Google Calendar and uses a hacked-up version of PHP iCalendar to do the heavy lifting. It works, almost always, and only occasionally breaks. I’ve got a few emails from people asking how I did it, and I’ve sent them files with a small write-up. For dealing with a Google Calendar, it works fine…

On the Brinn Labs web site we’re using The Events Calendar WordPress plugin, which exposes the upcoming events as an RSS feed. Well that’s easy!

events-files

Sitting on the server I’ve got a few files. A Perl script, which fetches and parses the RSS file, and an HTML-Template file, which the Perl script uses to make things look pretty. Oh, there’s also a background image, and the whole thing outputs a simple HTML file that Screenly then displays on the TV. Between the script and template there’s probably less than 75 lines of code. The script is set to run with a cron job and updates a few times an hour.

brinn-labs-events-tv

I’m pleased with the results, and not including the time it took me to run CPAN it was probably less than an hour to actually get it all working and looking nice. If you haven’t checked out the Brinn Labs events yet, take a look! I’ll be teaching classes there, and we’ve got an Open House set for March 1st, 2018.

Categories
Uncategorized

The (Feed Your Soul) NoiseBowl

noise-bowl-0353

Back in October of 2017 Marc Ownley (member of Milwaukee Makerspace and amazing metal artist) brought a bunch of wooden bowls to the makerspace and asked members if they wanted to create something unique for the Feed Your Soul event that was happening in November. I took one not knowing what I might do, but it sounded like a fun challenge.

fys-2017

I started to stain the bowl, and had an idea for layering stain using masks, but I just wasn’t feeling it. Then around the middle of October I headed out to Maker Faire Orlando and was gone nearly a week, so when I returned it finally hit me. I had built so many noisemakers for Maker Faire Milwaukee, I thought it appropriate to build one more. And the NoiseBowl was born!

noise-bowl-0357

I did just a bit more staining then a coat of polyurethane, and moved on to the wiring. The sounds this one makes is similar to NoiseMaker VII, although I did add a small amp to kick up the volume a bit. There are 3D printed parts (like NoiseMaker VII has) but in black this time. The speaker legs are borrowed from NoiseMaker IV.

noise-bowl-0358

It is similar to NoiseMaker VII in a lot of ways, which is fine, because that’s one of my favorites in the series.

noise-bowl-0360

At the Feed Your Soul event they hold an auction and people bid on the bowls, with all of the proceeds going to feed the hungry in southeastern Wisconsin, which is awesome. I had a lot of fun making this, and I hope whoever got it appreciates it and finds it to be fun, but more importantly, we were able to help people in need.

noise-bowl-0364

It’s rare that my art goes out into the world and doesn’t return with me. Typically I stick things in a box in the basement or eventually dismantle them (we’ve only got so much basement space!) I don’t know who has the NoiseBowl, but I hope they’re enjoying the noise it makes. Hopefully I can build something again next year.

Categories
Uncategorized

3D Printing (or trying…)

wandr-000

I wanted to print this diagnostic wand, and I started with what you see above, because it’s worked in the past. I also wanted it strong, so I used ABS, which I am not new to, but I haven’t done much ABS with this printer, as most of the things I’ve needed in the last year worked fine as PLA.

The idea is to print the top and bottom and then put them together with some bolts. Easy, right? If only… Besides printing in ABS it’s also the coldest time of the year, and the printer is in the basement, the cold cold basement. (And yes, the printer is in an enclosure.) So after multiple attempts at printing this, including adding brims and rafts, I tried something else.

wandr-001

I added walls around the print. The idea being, it makes the hot-end move around more and allow plastic to cool. Or something like that… it didn’t work.

wandr-002

So I tried a tighter wall, with less space between the object and the wall. And that didn’t work. Things still warped and curled. Did I mention how cold it was in the basement?

wand-8303

Happy New Year! Enjoy my failures of 2017!

I tried standing up the object. Less of it on the bed should mean less warping, right? Yes, except prints were still failing often, falling over, or breaking free from the bed. (See the video below for some great printing bloopers!)

wandr-003

Then I decided to add my own support structure, which failed, or caused me to destroy the print when cutting it free from the support structure, but I kept going.

wandr-004

I tweaked the support structure and got closer, though not quite where it needed to be…

wandr-005

Adding some little divots helped. I did all of this in OpenSCAD, so doing a difference on the support structure was easy because, you know, modules. Yeah, make everything a module.

wand-8302

Finally I got something that worked, about 6 different models and a dozen failed prints. The standup structure with supports that could easily be cut away worked. I should mention this piece needs to be strong and needs to look good. I started with an infill of 50% then dropped to 35% (with a 25% along the way, and one print with just 10% due to what appears to be a bug in Cura.)

Rapid prototyping is often anything but… Luckily we were able to mill one out of HDPE at work while I repeatedly failed printing this at home. (I’m hoping to try this again in a warm room with a Prusa i3 MK3 in the near future.)

wand-8264

And, oh yeah, somewhere along the way one of the prints that failed managed to rip loose the wires that powered the print cooling fan, which luckily is used for PLA, but not ABS.

wand-8269

Also, just a reminder… I’m not new to 3D printing. I’ve been doing this for more than five years.

wand-8289

wand-8300

wand-8287

wand-8301

And here’s some super-fun video of many of the failures I encountered along the way, as well as the final successful print.

Categories
Uncategorized

Five Dollars of your Makerspace dues…

five-dollars

Milwaukee Makerspace dues are currently $40 per month for a “full” membership, and we allow each member to “vote” for what areas they want to support with their dollars. In our membership software a member can choose up to five areas to fund, with a total of $5.00 per month. You can put all $5 towards one area, or split it up among multiple areas.

For instance, if you tend to use the laser cutters a lot, you can put your $5 towards the laser cutters. This compounds with the funds from other members, and creates a pool of money for the laser cutters that the Area Champion then gets as a budget. The Area Champion decides how to spend the money. They can purchase spare parts, materials, software, etc. Consumables tend to be at the top of the list for many areas. For the laser cutters that may be cleaning supplies and new lenses, and they may want to have enough cash reserve on hand to purchase something more expensive, like a new laser tube, if needed.

Other areas might stock up on tape, blades, glue, small tools, etc. Besides building up a fund for each area, the “vote with your dollars” method also allows the members (and Board of Directors) to see which areas are the most popular. (Assuming people put their money towards the areas they care about and use.)

Here’s an snapshot of the funding as of the writing of this post. (The raw data is available here.) Note that a low dollar amount doesn’t necessarily mean an area is unpopular, as they may have just spent all of their cash. It’s better to look at the monthly allocation to get an idea of the popularity of an area, listed as “Current Member Funding” on the page.

Area Dollars
3D Printing Area $830.03
Anodizing Area $0.00
Forge Area $1,198.82
Casting Area $635.25
Ceramics Area $356.04
CNC Area $496.36
Craft Lab $847.76
Electronics Lab $725.66
Metal Finishing Area $163.48
Jewelry Area $575.60
Laser Lab $2,642.60
Leatherworking Area $339.50
Maker Faire Funding $677.29
Metal Shop $1,134.20
206.76 $189.01
Power Racing $163.67
Print Area $189.80
Soda Fund $129.00
Vacuum Former $164.35
Welding Area $624.22
Wood Shop $1,482.69

Besides the $5.00 per month that members can allocate, they can also choose to donate directly to these areas using our member management software (which is built on Wild Apricot.) This is a good way to support an area that you might use infrequently. For instance, I used the Paint Room quite a lot for two weeks leading up to Maker Faire, so I just did a straight donation to that area rather than change my monthly allocation.

I mentioned “full” member above, and that’s because we also have “family” members, who are add-on members that only pay $10.00 per month for their membership. We scale down their $5.00 per month to just $1.25 per month, so they can choose up to five areas to support, but at only 25 cent per area.

Obviously not all spaces can operate in this fashion, but with close to 300 members and a good financial standing we’ve got what I think is a pretty good system.

So, how does your space do it?

(Note: I was told that the Anodizing Area was rolled into the Metal Finishing Area, so that’s why the number is $0.00. It’s still in the system due to legacy reasons.)