Categories
Uncategorized

The Moxie Board

Moxie

A large part of the Power Racing Series is Moxie. Moxie is best described as, being awesome. The crowd gets to vote for your car using the Moxie Board. Each button press equals a vote. Being fast is one way to get points, but another way is by being awesome… so, Moxie.

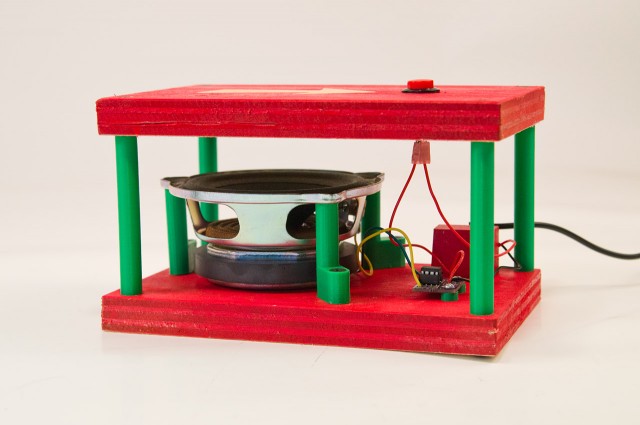
Above you’ll see a photo of the official Moxie Board used by the series. Since we also had a PPPRS race during Maker Faire Milwaukee, which overlapped the race in New York, we had to build our own Moxie Board, so here’s what we did…

The Moxie Board

It looks fairly similar, but it’s a bit smaller and lighter than the original, and it’s got 24 buttons instead of 30 (though I believe the original was recently expanded to have that 30 buttons. Who knew there’d ever be that many cars in a race!)

I got some Coroplast from Midland Plastics for super cheap, and they didn’t have any wide enough, so the black strip running down the center is gaff tape used to hold two pieces together to be wide enough. I then found some scrap wood in the shop at work which was long enough, but too skinny to be used for anything else, and built a simple frame with some small blocks of HDPE in the corners to hold it all together. (I was told the reduced weight of this Moxie Board was a big plus.)

The front is screwed into the wood frame, and the back is held in place with some VELCRO® hook and loop so we could open it to get to the electronics…

As for the inside and the electronics, while the original uses an Arduino Mega with a Bluetooth module to send real-time updates to Patrick’s Android phone which is running some special app, I chose to do it differently.

moxie-board-04

I’m using a Teensy 3.5 which has plenty of input pins and a built-in MicroSD card slot. The way it works is simple, each button represents a number from 1 to 24, and when pressed, the Teensy gets the value of every button, with the ones not being pressed equal to 0 and the one being pressed equal to 1, and then writes it to a file called MOXIE.csv. When the race is over you just put the MicroSD card in a card reader and import the CSV file into a spreadsheet and grab the last row. (Hopefully your spreadsheet is set up with the names of the cars in the corresponding columns.)

In testing, this all worked fine, but obviously the real world had to come along and crush my hopes and dreams…

moxie-board-05

Failure #1: Because the Teensy is a low power device, it doesn’t draw much power from the USB battery pack we were using. I’ve seen this before, so I use a battery pack with a built-in LED “flashlight” that stays on, as long as you press and hold the button when turning it on. I told this to two people, but forgot to write instructions to put inside the Moxie Board, so there’s a chance this was not done properly and power was lost. (There is an indicator LED that lights up when a button is pressed, but not a “POWER ON” LED which would have helped… maybe.

Maybe Failure #2: It could be that my code isn’t quite right. I do not have the most recent code that the official Moxie Board is running, but I have an older version that may be close. My code is a little different, but should yield the same results… I think. This is worth checking on.

I also do not have a good way to attach Moxie Labels, so they are just attached with tape or Hook and Loop for now. Ran out of time for anything better. :/

One more note! In the photo there’s a bunch of green wire and LEDs attached to the front of the Moxie Board. Those were added for the night race. All the actual wiring for the Moxie Board is located on the inside.

moxie-board-03

I’ve heard of one other group working on a Moxie Board that will use a Raspberry Pi, which I thought about doing as well, but ended up choosing a Teensy instead. As we add more races, we’re going to need more boards, so I’m hoping we see more ideas and eventually come up with even better ideas. (Note that I wanted to stay simple because simple gets done while over-complex builds, while fun, don’t always get finished, or work properly. But then, who am I to talk!?)

Categories
Uncategorized

Hakko FX-901 Portable Soldering Iron

Hakko 901

I’ve got a Hakko FX-901 Cordless Soldering Iron and I love it. I was reminded how much I love it when Donald mentioned it in Maker Update #37.

I got mine about two years ago after using one at the Be A Maker space. I stick a set of rechargeable AA batteries in it and I’ve usually got it ready to go when needed. Oh, while you can find it on Amazon for about $32, I got mine from SparkFun where it’s usually $34.95 but you can sometimes find it on sale for $24.95, which is an awesome deal!

The one thing I don’t like about it is the replacement tips. Right now a Hakko T11-B Tip for FX-901 is $24.95. Yeah, that’s the same cost as a new (on sale) iron from SparkFun. Hmmm…

I know some people really like the butane soldering irons, and they can be found for cheap, but I prefer rechargeable batteries to dealing with butane fuel. Also, I’ve flown more than once with the Hakko, and bringing AA batteries on a plane is not an issue. :)

Categories
Uncategorized

SparkFun Soldering Iron Fix

sparkfun-iron

A long time ago I picked up this 50W Soldering Station from SparkFun, and it’s worked well over the years. (Also, props to SparkFun for still listing retired products on their site!) The nice thing about this iron is that it can use Hakko tips, and since I can get Hakko-compatible tips super-cheap on eBay, I’ve got a lot of tips in the shop so I’m never without one.

I could have got a Hakko, but they are more than twice the price, and while I do use a Hakko at work, I went cheap at home because sometimes I’m cheap. (You may remember the time I had to fix a Hakko FX888D Soldering Station.)

iron-handle-907

The one thing I didn’t like about the SparkFun iron was that the handle seemed a little flimsy. Not at first, but after years of use. It finally got to the point where the heating element was wobbly on the handle, and when I took it apart, I couldn’t get the tip off easily, and when it came off, the end of the heating element broke. (I should note that I probably solder things a few times a week, so it definitely got some good use.)

atten-907

I had to find a replacement handle, and it requires one with 7 pins. After browsing around eBay for a bit I found the 7-Pin 907 Soldering Iron Handle For AT936b AT907 AT8586 ATTEN Soldering Station, which seemed like it was the right one. I figured that for under $8.00 I’d just order it and hope it worked. And it did.

I also learned that the SparkFun iron is basically an ATTEN 937b Anti-static Rework Soldering Station, which you can find cheap on eBay as well. (I mean, lots of things are cheap on eBay, because they may be knock-offs or just not that good. YMMV.) Also the ATTEN 937b is basically a knock-off of the Hakko 936 ESD Soldering Station with Medium (907) Handpiece. Oh look, the “907” handpiece. Of course.

Happy Soldering!

Categories
Uncategorized

Maker Faire (UW) Milwaukee 2017

UWMakey

Last year I was really pleased to see so many people & groups from UWM involved in Maker Faire Milwaukee. We’ve got another great batch this year, which I’ll share below.

I also want to call out Bryan Cera, an alumnus of UWM, and an all-around amazing maker. If you’re not familiar with Bryan check out his Maker Spotlight. Bryan is now a Professor at the Alberta College of Art and Design, but we’re pleased to see he’ll be returning to Maker Faire Milwaukee this year.

We’ve also got a few returning favorites, and some new friends joining us:

Among the list are a few current students and recent graduates. We’ve also got few alumni working as producers and crew this year. Even Stephen Pevnick, Professor Emeritus is joining us! He was one of my instructors many, many years ago at UWM. It was great to meet him again and get a tour of his studio, and I look forward to see his Graphical Waterfall at Maker Faire Milwaukee this year.

Categories
Uncategorized

Arduino Presentation

Arduino - The First Sketch

The Inventors & Entrepreneurs Club of Kenosha & Racine invited me to give a talk last year but I was busy teaching PCOMP at UWM so I couldn’t make it, but I offered to come during the summer and we scheduled August for me to visit and talk about the Arduino microcontroller.

A few people were familiar with the Arduino, and one or two had even used them before, but for most people this was an introduction. I covered a bit about what the Arduino is, and what it can do, and how you might use it for prototyping a product.

I updated the Presenations page and added the Welcome to Arduino slides, and noticed I hadn’t given any presentations in 2016, but then I remembered that I had a class full of students twice a week during that time and was pretty much presenting constantly. Life is weird sometimes. (And actually I did do some presentations while at UWM, so maybe I’ll dig through those and post them.)