Categories
Uncategorized

Drawbot Tool Holder

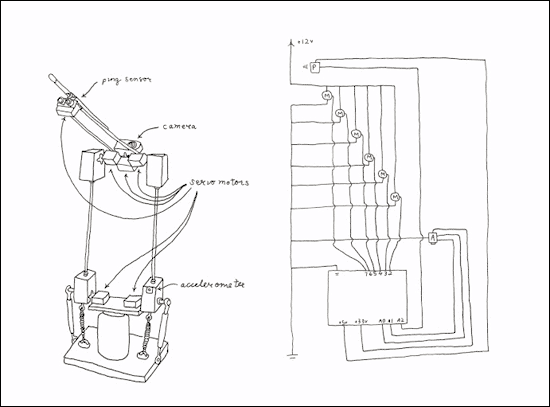
One of the issues I’ve had with the Friday Night Drawbot is the part that holds the tool has never been very solid. In early revisions I used corrugated plastic, and would just use an X-ACTO knife to cut a hole for a Sharpie, and it would work well enough, and when the plastic wore out, I’d replace it with a new piece. (The most recent body design failed miserably at producing a good pen holder.)

Since I’ve been using other things besides Sharpies, including pencils, charcoal, paintbrushes, clay tools, etc. I decided to design a proper tool holder.

Tool Holder Mockup

I typically use Inkscape to design laser-cut things, but often visualizing a 3D object, even if it will be made from flat pieces, can be difficult, so I decided to use OpenSCAD to model it in 3D. It definitely helped me picture how it would be assembled. I also had the idea of exporting the “plates” from OpenSCAD into DXF files I could then use for the final laser-cut design but that failed miserably.

Sizing

Here’s the start of my layout in Inkscape with the pieces laid flat. This let me get a good idea of the dimensions.

Tool Sizes

I wanted the tool holder to be adjustable, and handle tools from 8mm wide to 16mm wide. (In this top view, the blue circle represent the different sized tools, the yellow piece pushes the tool into a v-shaped piece to hold it tight.)

Layout

Here’s a top view of the layout with some guides to help align things. This is designed for 3mm Baltic Birch (though acrylic could be used.) The slots and tabs are all set for 3mm. There are no fasteners planned as I’ll be gluing it all together.

Layout

Another view from the top, this time with some pieces rotated 90 degrees to see how they will fit together.

Laser Ready

All of the pieces laid out flat and ready to be laser cut. I used 3mm Baltic Birch which worked well using the Epilog Zing 40 watt laser cutter at the DCRL. (I also ended up adding yet another laser cutting workflow to my list. I now have three different methods depending on which of the four lasers cutters I typically use.)

Tool Holder

Assembled with some wood glue, and using rubber bands to hold the tool in place. It works… sort of. I’m already planning improvements, so expect version 2 to arrive by next week. I may switch to a screw mechanism for tightening, which was my original idea, as the rubber bands aren’t working as well as I hoped.

Categories
Uncategorized

Neko: A Painterbot

Neko

While researching art robots, I stumbled upon Laura Lippincott‘s Neko, a painting bot.

Laura describes herself as such: “I’m an artist that teaches robots to paint. And the robots teach me to paint, it’s symbiotic.” (Well said!)

There’s some background info on Neko, and she’s also got a blog at painterbot.blogspot.com. That’s actually how I found out about Laura and Neko, as she had a link to my Arc-O-Matic project in a post.

Neko

Many of the old photos look similar to my early revisions of my rolling drawbots. There’s an element of being made by hand, and sort of hacked together with hot glue and zip ties. People have actually responded to this aesthetic in my own work quite positively, even now as I’m headed more towards refining a design that moves away from that look. (I can’t help it, I also love designing objects, and creating digital files that can be shared.)

Neko

I’ve been (sort of) challenged to introduce paint as a medium to my rolling draw bots. It’s something I’m considering, though it does have its own set of challenges, as a mobile robot doesn’t have the same properties as an arm. Still, I like challenges…

Neko

Laura managed to successfully fund a Kickstarter campaign for Neko last year. (I won’t deny I’ve considered doing a campaign to extend the reach of what I’m doing with my drawbots, though I’m also considering other options for expansion.)

While there’s multiple web sites to learn about Neko and the work Laura is doing, there’s also an occasional video on YouTube. Here’s one from summer 2014 showing Neko at work.

This is great stuff, and I’m learning that there’s a lot of information out there on “art robots”, and I’ll do what I can with the little free time I have to read up on other projects and artists. Feel free to drop me a line if there’s something I should see.

Categories
Uncategorized

What is Digital Fabrication and Design? (Part II)

What is Digital Fabrication and Design?

In our last post we talked a little bit about what Digital Fabrication and Design is, or might be. This time we’re going to look at a specific example which should make us question what Digital Fabrication and Design should encompass.

I talked to a colleague of mine at UWM, a Grad Student named Broc Toft, about how he used digital tools to design something that he eventually made by hand. He described this as “Digitally Crafting to Manually Making” and provided me with some images and text to describe his process.

Broc's Design
The model was created in Rhino.

Broc's Design
I then used “Unroll Developable Srf” function to get surfaces. (I then printed it out on paper to use as a template.)

Broc's Design
This is the MDF cut using the templates. (Note: The MDF was manually cut. If I had used a CNC machine to cut it I would have had to modeled the chamfer to deal with the angles.)

Broc's Design
I then assembled and polyurethaned the model.

Broc's Design
In coddle form, ready for plaster.

Broc's Design
After the plaster was poured.

Broc's Design
The finished plaster mold.

Broc's Design
The ceramic positive that came out of mold.

Broc's Design
The end result; 21 of them used with projection mapping. (You can also see a video of the installation.)

So there’s a lot of things done by hand, and while “Digital Fabrication” wasn’t used, “Digital Design” was, at least to create the original form, and to assist in creating a template. One of the interesting aspects is that if Broc had been making a number of these forms using MDF or some other easily machinable material, using a CNC machine to create them would make more sense, but with just one needed to used to create a mold, perhaps making it by hand was the right option. Broc also noted that someone much more skilled in Digital Fabrication may have been able to CNC the whole thing and avoided doing things by hand. (My own thought is, do what works to get things done!)

While writing this post I also came across this Instructable titled Digital Fabrication By Hand, which demonstrates the same idea.

(Previously: Part I)

Categories
Uncategorized

Makin’ Boxes!

MakerCase

A few years ago I mentioned Rahulbotics’ BoxMaker, and I’ve used it plenty over the years when I needed to laser cut an enclosure, but when someone has a good idea, eventually someone else decides to implement their own version. (This is good!)

One of the other box making sites I’ve used recently is MakerCase, which has a few more features than Rahulbotics does, including a choice of edge joints, specifically t-slot, which lets you create cases that can be assembled with nuts and bolts, though the choice of nut & bolt sizes are a bit limiting. Still, it’s a good effort, and I use MakerCase quite often.

make-a-box is another one I’ve taken for a spin. It didn’t offer much in the way of special features, except for the fact that all the Ruby code is in github ready to be forked. (Of course if you prefer Java, look at Rahulbotics’ BoxMaker code instead. Or, check some of the other boxmaker code.)

If you’re looking for non-web-based solutions, supposedly 123D Make has a beta out with finger joints. But it’s been nearly a year and I still don’t see that option in the software. I’ve also tried this BoxMaker for Inkscape, but it just gives me errors and fails to work.

I’ve long wanted a box maker for OpenSCAD, and I did find Parametric box maker for lasercut on Thingiverse, and it’s definitely something worth playing with, though on my creaky old laptop it’s not speed demon. Still, I really like the idea of code I can download and run rather than relying on a web site to generate a box.

I’ll continue to explore box making options that work well with laser cutter and other CNC machines, but if I’ve missed an option you know about, please let me know!

Categories
Uncategorized

Science, Technology and the Future of Art

Blue Gears

If you happen to be near Palo Alto this month stop by the Pacific Art League to see my piece “Blue Gears” in a gallery show titled “Science, Technology and the Future of Art”.

This is the first juried exhibition my work has been in. Typically I’ve shown my work at gallery night events or more maker-style events, and I was invited by the Beaver Dam Area Arts Association to take part in their “Beyond Your Imagination” show back in January 2013, but this is a new thing.

I found that since starting grad school I’ve really been able to focus on where my work is headed, and critically think about where it fits in the world.

(Oh, and if you’re not familiar with all of this, here’s some background on my art robots.)

(Big thanks to the folks at Evil Mad Scientist for helping out with the shipping and delivery. And yes, the robot that created this was indeed controlled with a Diavolino!)