Hey, we printed some shirts at Milwaukee Makerspace! There’s a nice 4-color screen printing machine at the space, and it’s been sitting in the back hallway neglected, and since I used to do screen printing full time (and as a hobby) I figured I’d get it cleaned up and use it.

Instead of burning a screen with photo emulsion I ended up just cutting some vinyl with the Silhouette and applying it to the screen. It’s a trick I learned from Brent at Lovesick Robot Studios, and for short runs it works pretty well. (There’s clear packaging tape covering the rest of the screen. It’s a little hard to see in this photo.)

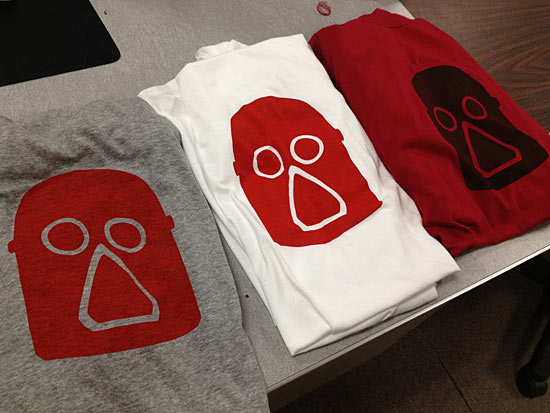
I used a (slightly) modified version of the helmet from the standard logo, and opted not to include the wrench and soldering iron due to the fine details they have, which is a lot harder to do with vinyl.
We started with red ink on white shirts, and slowly added black ink to get some one-of-a-kind prints. Eventually the ink gets darker. Once it was black we started printing some red shirts as well. We also did a black shirt for Audrey. I suggested doing a print-dry-print process, but she really liked the subtle look of a single print.

We probably printed 25 shirts, which we wore in the South Shore Frolics Parade so we at least looked like some sort of real group instead of a bunch of crazy weirdos riding on children’s toys… oh wait.
And when I say “we” I mean that I showed others how to screen print, and a few people printed their own shirts. I also talked through the process, which was cool, as it’s been a while since I shared it with others.
I’ll be doing more screen printing at the space in the future, like next week probably. If you need help with a screen printing project, let me know.


![annular[8]](http://rasterweb.net/raster/wp-content/uploads/2013/06/annular011.jpg "annular[8]")
![annular[8]](http://rasterweb.net/raster/wp-content/uploads/2013/06/annular009.jpg "annular[8]")

