Categories
Uncategorized

Mac-Cat-Attack!

RepRap Cat

I’ve already talked about the Top 5 Places Kitten was, but since kitten (who is now a cat, and sometimes referred to as RepRap Cat) spends a lot of time in the office with me, I thought it was time for a new list…

The top 4 Macs kitten has sat upon:

  1. MacBook Pro
  2. Mac mini
  3. G4 PowerBook
  4. Mac Pro

She also spends a lot of time on the printer, which isn’t a Mac, but has a lot of buttons to press.

The only Mac missing is the iMac, and that’s because she hasn’t figured out how to sit on top of that one… yet.

Update: I snapped this picture less than two hours after posting this.

Categories
Uncategorized

UI Mockup/Diagram Apps

UI Apps

I wanted to mock up a control panel for a project (a real physical control panel, not a software control panel) and remembered that I had OmniGraffle on one of my machines, so I started with that. Unfortunately it appeared that it was a demo version and was limited to 20 objects.

OmniGraffle

OmniGraffle is a sweet application, and I considered buying it, but at $99 for an individual license, for an application I probably won’t use that much, I opted not to pursue it. (Oh, and I did think about just using Inkscape, but I thought it would be more fun to use a diagramming specific application for this project.)

Dia

I found Dia, an open source, multi-platform application for creating diagrams. Dia actually looks like a pretty nice application, and I do prefer open source when possible, but I also find X11 applications a bit clunky, and while I’ll keep an eye on Dia, it didn’t quite live up to what I wanted…

Pencil

I ended up revisiting the Pencil Project, which I looked at last year, and I really like it. It’s a great application for mocking things up, and it even ties into one of my favorite sites, OpenClipArt.org.

Pencil Menus

The one annoying thing about Pencil is the menus. I’m using Mac OS X, and I’d like the menus to work as they do on Mac OS X, and these are just weird.

Here’s the output I got from each application. It should be mentioned, these are all rough, and by no means final. I really just wanted to quickly kick out a design from each application.

OmniGraffle Mockup
OmniGraffle Mockup

Dia Mockup
Dia Mockup

Pencil Mockup
Pencil Mockup

I’ll probably use Pencil moving forward and see how much I can push its capabilities. (And yes, it’s also open source and multi-platform, which is one more great thing about it.)

Categories
Uncategorized

Convert all the files!

Convert all the files!
Thanks Tom!

It seemed like a simple enough request… While at Milwaukee Makerspace we were discussing creating snowflakes on the Laser Cutter, and I mentioned that there should be some existing art on OpenClipArt.org, but it was down that night, so I jumped over to Thingiverse and found this snowflake.

As a bit of background, I’ve been pretty damn good at file conversions in the past. Audio, video, markup, raster images, anything 2D has been pretty simple. I mean, I’ve been using Photoshop since version 1.0.7. I know how to deal with that stuff… but 3D? It’s a whole new nightmare world!

Snowflake

The file was an STL, which is meant for 3D printing, but we needed more of a 2D vector file. I know how to load a DXF file into the Laser Cutter, so I figured I’m import this STL into Google Sketchup (via a plugin) and then export as a DXF (via another plugin) and that would be it.

Well, that didn’t work. (Oh, and by “didn’t work” I mean I was unable to open the DXF file in Inkscape. At this point I was still waiting to use the Laser Cutter so I didn’t get to try importing it on that machine. I figured that as long as I was waiting, I’d try to get a format I knew would work.) On to the next idea.

I exported the STL from Google Sketchup as a DAE file, and was able to open that in MeshLab. Once again I tried a DXF export, but that one wouldn’t open in Inkscape either. Argh!

Snowflake

So I made a radical decision… Since I could view the file in MeshLab, I just did a screen shot so I could get a nice, clean 2D version of it.

Snowflake

Of course if I had known I was going to do this, I probably could have just done it in Google Sketchup by altering the view… Still, the MeshLab method seemed solid.

Snowflake

I then took the screen shot and opened it in Photoshop, did a little editing, and converted it to black and white. (I considered creating paths, and exporting them, but at this point I wanted to go with what I knew (or thought) would work, and that meant getting a clean PNG file into Inkscape to convert it from a raster to a vector file via trace bitmap.

Snowflake

So finally, I had my SVG file! A vector file I could open in Inkscape and export as a clean DXF file that I was reasonable sure would open and work on the Laser Cutter…

Snowflake

Oh wait, at some point along the way I had created an OpenSCAD file, to test the other DXF files. They wouldn’t render due to some weirdness, but the new one I exported from Inkscape did. This made me feel a little more secure that this file would work.

So how did it turn out? I don’t know!

The Laser Cutter was in use making ornaments, and I couldn’t stay late enough to get a chance to use it.

And just to be clear… while there were many steps in the process above, the whole thing took about 20 minutes from the first file export to getting what seemed to be a good DXF file.

I’ve converted a lot of files in my time, but doing so for these CNC machine is proving to be a new challenge.

Of course half the fun is seeing if it will work, you know, on the machine… which I hope to test at some point. :)

Categories
Uncategorized

Processing PhotoBooth

You probably know I’m a fan of Photo Booths, and while Sparkbooth is awesome software, you might want something free (and open source) so here’s “PhotoBooth” written in Processing.

This is all the code you need for the most minimal photo booth application:

/**
 * PhotoBooth.pde
 */ 
 
import processing.video.*;
Capture cam;

void setup() {
  size(1280, 720);
  cam = new Capture(this, 1280, 720);
}

void draw() {
  if (cam.available() == true) {
    cam.read();
    image(cam, 0, 0);
  }
} 

void keyPressed() {
    if (key == ' ') {  // space bar
      saveFrame("picture-####.jpg");
    }
}

Once you’ve got that, you can export it as an application from Processing.

(Note that I’m using a Logitech C910 webcam, so I’ve set the resolution to something that makes sense for that camera. If it looks weird with your camera, try 640×480 or something else.)

PhotoBooth Export Application

I generally use Mac OS X, but other operating systems are supported. This is one of the great things about Processing.

PhotoBooth Application

Over in the Finder you’ll see a standalone application named “PhotoBooth” that will run fullscreen when launched. (You can exit it by hitting the escape key.)

Spazz!

Once you launch it you’ll see some spazzy dude, wait, that’s me! You’ll probably see yourself instead.

Hit the space bar, and it’ll save a photo. Hit the space bar again and it’ll save another one. And on, and on.

PhotoBooth Photos

The photos will show up in the same folder as the application. They will have a random number in the name. It’s not sequential, but you can view by date created if you need them in order.

Here’s a more full version of the Processing code with a few extras commented out. Uncommenting them may prove useful for debugging or camera set-up.

/**
 * PhotoBooth.pde
 */ 
 
import processing.video.*;
Capture cam;

void setup() {
  size(1280, 720);

  // If no device is specified, will just use the default.
  cam = new Capture(this, 1280, 720);

  // To use another device (i.e. if the default device causes an error),  
  // list all available capture devices to the console to find your camera.
  //String[] devices = Capture.list();
  //println(devices);
  
  // Change devices[0] to the proper index for your camera.
  //cam = new Capture(this, width, height, devices[0]);

  // Opens the settings page for this capture device.
  //cam.settings();
}

void draw() {
  if (cam.available() == true) {
    cam.read();
    image(cam, 0, 0);
  }
} 

void keyPressed() {
    if (key == ' ') {  // space bar
      saveFrame("picture-####.jpg");
    }
}

And hey, I know that hitting the space bar ain’t cool… so you might want to use an awesome button instead.

This is a super-simple application, which basically takes some example code that ships with Processing and adds a bit to it. I hope to have a few more posts that talk about some changes you can make to this application. Stay tuned!

Categories
Uncategorized

The iPhone 4S Camera

I’ve been meaning to do some iPhone 4S camera tests for a while now, and rather than wait and wait while I come up with a scientific method, I thought I’d just do a few shots and post them here. Early and Often, right?

Each photos links to the Flickr version you can view it at various sizes. None of the photos have been retouched at all.

iPhone Test 01
Normal iPhone 4S photo with direct light.

iPhone Test 01 (HDR)
HDR iPhone 4S photo with direct light.

iPhone Test 02
Normal iPhone 4S photo with soft light.

iPhone Test 02 (HDR)
HDR iPhone 4S photo with soft light.

For each shot the iPhone was on a tripod, and an overheard light consisting of a single bulb was used. (It’s a large high wattage bulb from an old photostat machine.) For the soft light shots, I put an umbrella in front of the light. I used Apple’s default Camera app that comes on the iPhone. All were shot on the white sweep I use for all my tabletop stuff. (If you’ve seen my Flickr stream, you’ve seen plenty of shots on that sweep.)

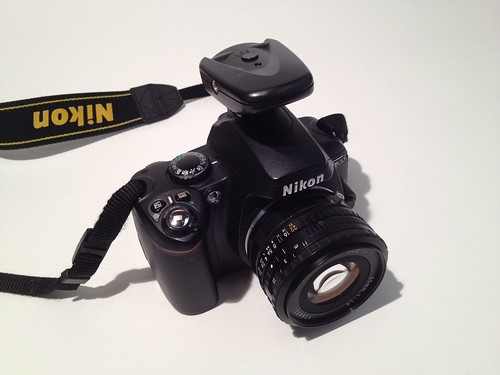
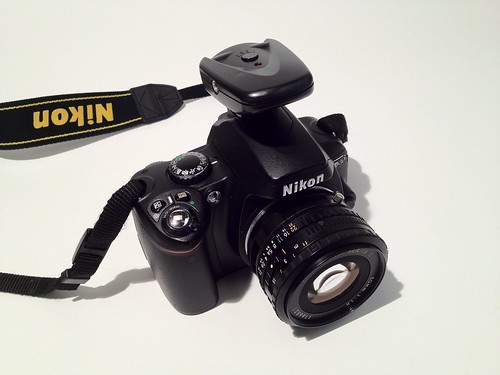
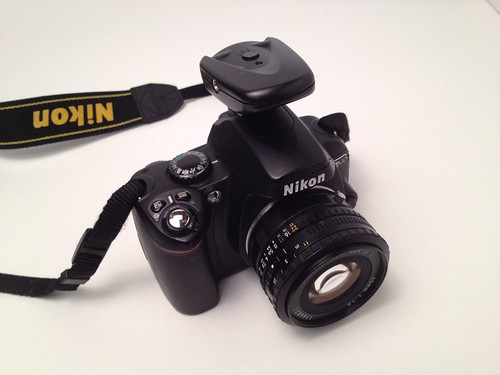
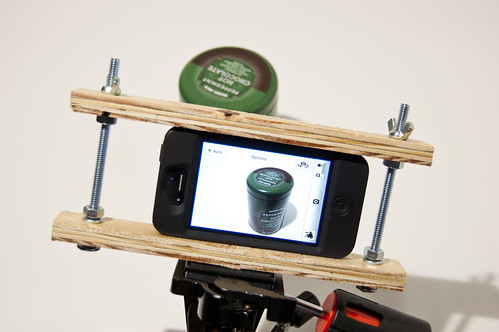
iPhone Tripod Mount
Experimental iPhone Tripod Mount

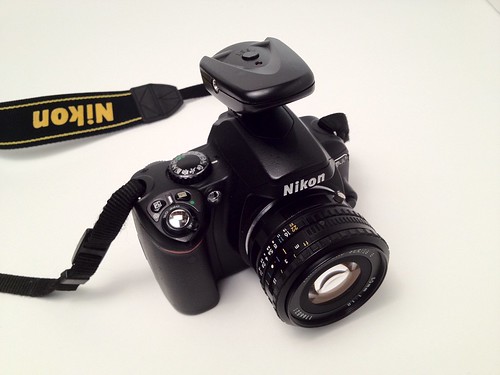
This photo of my “Experimental iPhone Tripod Mount” was taken (handheld) with my Nikon D40. If you wanted to compare the two, the iPhone 4S is supposedly an 8 Megapixel camera, while the Nikon is a 6 Megapixel camera. Size isn’t everything of course. Well, the Nikon does have a bigger lens, so that helps quite a bit. The Nikon also shoots in RAW, and yes, this shot has been edited quite a bit, but hey, that’s what I do with RAW photos. (And I mainly took this shot to show the set-up I used.)

When I get ambitious again, I’ll set up two tripods, one with the iPhone, and one with the Nikon, and do duplicate shots of various objects. Until then, enjoy these… I’m off to work on my Experimental iPhone Tripod Mount Version 2.0