I needed a way to shoot video and photos on my phone while facing straight down at a desk. I grabbed one of these adjustable suspension arms with the thought that I would figure out some way to mount my phone to it… and I did. (Ugh! I got the arm for less than $10 but it’s closer to $20 now.)
As luck would have it I found some GoPro mounts in a dumpster a few weeks ago, including a 1/4-20 mount which screws onto the end of the arm. I then laser cut a piece of 1/8″ Baltic Birch and as luck would also have it it only takes a little bit of sanding to get it to fit into the slot of the GoPro mounts.
I drew up a piece that was approximately the size of my phone, and then put in some notches where the camera is, and made it so I can flip the camera around either way. (I also cut one without the “speed holes” in it.)
I was recently contacted by an artist who really liked The Big Button and wanted to use it for an art installation. After some discussion it turned out they really didn’t need a USB controller but needed something to trigger an audio player. When I asked what they were going to use for an audio player they said they didn’t know, so I suggested building the whole thing to ensure it would all work together. And it did.
The control box (which is the “audio player” in the simplest terms) allows the button to plug into it using a 3.5mm TRS cable. This allows the customer to swap out to a longer or shorter cable if needed. 3.5mm TRS stereo cables are everywhere and pretty cheap. Since we only need three wires there’s no need for a more complex connection. (Though if you need an RJ-45 solution, we’ve got that covered.)
The control box also has a 3.5mm jack for audio out. This is to connect to external powered speakers or a PA system. (Or headphones!) And in the center of the front panel is a Mini USB jack for powering the unit via a Mini USB cable and a 5 volt wall wart.
There’s a hole on the side of the unit for access to the Micro SD card in the audio player. Just in case sounds ever need to be changed, or if the card fails, etc. Without this hole it would be very difficult to get to the card. (Just like the Game Show Buzzer System I covered the hole with tape before shipping.)
Here’s a look inside the unit. There’s an Arduino Nano with the audio player, and the 3.5mm jack and… some wires! And a few wire connectors taped together just to prevent them from rattling. This was a quick build but it came together fairly easily. I did a good amount of testing with this one, and luckily it all went well. (I should really build a permanent testing station again, as it’s becoming of a need lately.)
So hey, if you need some weird electronic device that does something… let me know!
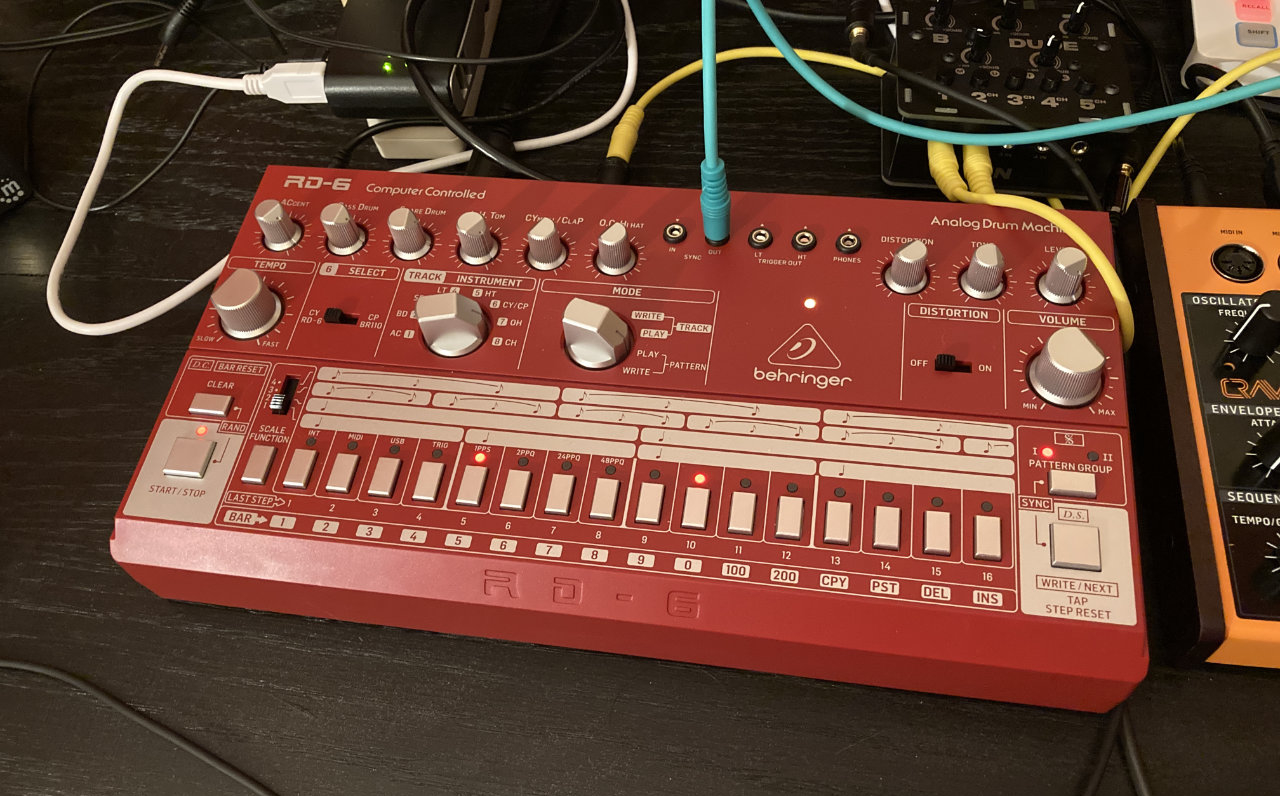
The full title of this should be Syncing a Behringer RD-6 Analog Drum Machine to a Pocket Operator PO-14 Sub with a Raspberry Pi Pico Microcontroller. That’s a bit long, but it’s also descriptive. The RD-6 can be synced via MIDI, but the Pocket Operators do not do MIDI. The RD-6 does have an analog sync in which will trigger at over 2.5 volts, but the Pocket Operators output about 1 volt when they sync with each other.
I’d seen a few ideas and potential solutions online. One involved a DC boost converter, so I tried one but it didn’t work. Another involved using an overdrive guitar pedal, but I don’t have one…
What I do have are a bunch of Arduino boards of various types. I originally grabbed an Arduino Nano with the idea that I could capture the PO-14 output at 1 volt with an analog pin and then output a pulse on a digital pin as a trigger. The Arduino outputs at 5 volts though, and while I don’t mind making a voltage divider, I also had a Teensy LC on my desk, so I tested with that since it runs on 3 volts. And then, since my desk is fairly large, I grabbed a Raspberry Pi Pico microcontroller which also runs on 3 volts. I used the same Arduino code on the Pico as the Teensy (thanks to the work of Earle F. Philhower, III).
This is literally all there is to the code. I added an LED which blinks when a pulse is read, and then I just connected the signal wire to the same pin as the LED (and the other to ground) and plugged those into the sync in of the RD-6.
I’m new to all this syncing of musical devices, and this may be the wrong way to do it, but it worked for me. I did try to set the RD-6 as the master device and sync the PO-14 to it, but it didn’t seem to work quite right. The voltage may be a bit too high causing erratic behavior on the Pocket Operator.
Since this works, I’ll probably stick with it unless someone tells me it’s a terrible idea or tells me a better way to do it that is cheap, easy, or involves things I already have.
I recently completed a build for a client that I’m calling a “Game Show Buzzer System” because, well… that’s what they asked for. The requirements were a system with two buzzers, green and red, that when pressed each played a different sound. They also wanted a light controlled, as they were going to build this all into a podium for some game show broadcast on the Internet.
At first they asked for colored light strips, so I was going to use NeoPixels, but then they switched to wanting to control a DMX light. I didn’t have a DMX light handy so I got the cheapest one on Amazon to start doing development with. Meanwhile they shipped me a very nice professional DMX light. I got the code working on my cheap light, but once moved over to the good light it didn’t work without some tweaking. Different DMX lights operate differently, duly noted.
The electronics live in a 3D printed enclosure. This probably took more time than the code. (But since code is often reused, that’s not surprising.) This project came together pretty quickly, but if it hadn’t I probably would have spent more time on the enclosure. It’s not bad, it just has a few things that annoy me about it. Everything is labeled, which is good, because it is possible to plug the 3.5mm plugs into the wrong place.
The top features a knob and small display which are used to set the reset time for the unit after a button is pressed. The client thought that 30 seconds for the reset might be good, but while discussing it there was concern that might be too long, so I suggested a way to adjust it.
The large buttons use 3.5mm jacks and cables to connect. Since TRS cables have three connections, they’re perfect for items with GND, a button, and an LED. This also allows for the client to easily swap cables if these are too long or too short.
The client provided the sounds. (Well, links to YouTube videos with the sounds.) If they ever want to replace the sounds, or the SD card fails, it can be easily accessed. I didn’t have time to make a door or panel for this, so I covered it with gaff tape before I shipped it.
A peek at the inside. It’s a little tight, but there’s a lot going on in there. I ended up making my own “shield” to connect everything because, this was a rush project, but it all works, even if it’s not the prettiest thing I’ve built. I did about 4 days of testing before shipping it out. It all works, and it was a fun and challenging build. Neat!
July looks good by the numbers.. 100% compliant, which means I used my CPAP machine for at least 4 hours each night. While using the machine while sleeping is the goal, it doesn’t mean that I’m getting good sleep, or enough sleep.
I averaged 6h15m of sleep per night in July (June was 6h36m and May was 7h06m). While these numbers are good, I know that in reality I often lie awake in the morning, mask on, unable to sleep. It’s often around 4:30am or later, which means I’ve got my 4 or 5 hours of sleep, but then I’m not sleeping buy still masking. Often I give up by 5am, get up and… go lie down elsewhere in the house. I don’t fall asleep again, even though I’m still pretty tired.
Lately when I’m up at 5am I make some Pocket Operator jams, so at least I can be creative, do something I enjoy doing, and not just stare at my mobile and scroll the morning away.