If you haven’t read the first installment, check out Learn to Solder Kit (Part I) to get up to speed.
Since I’m etching my own boards, there’s a number of steps in the process. I’ve covered it all in the photos below, and I’ll add in a bit of text to explain things.

I start with cutting vinyl on a Silhouette Cameo. Any vinyl cutter will do, this just happens to be the one I have at home. (We have the same model at Milwaukee Makerspace, and the DCRL has a much larger vinyl cutter.)

The vinyl after being cut. I’m using old scraps of various sizes, and I’ve got an old blade, and an old cutting mat, and sometimes it cuts almost all the way through the vinyl, but for this application it all works out fine.
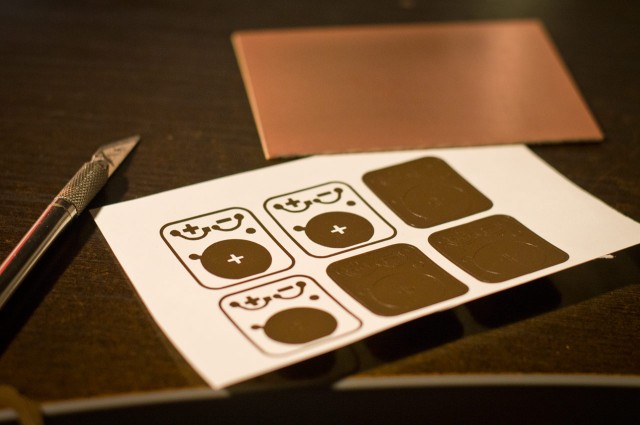
Next is weeding, or removing all of the bits of vinyl we don’t need. I tend to use an X-ACTO knife to pick and grab off the pieces. It works well for tiny things like this.

The vinyl is all weeded and we’ve got a piece of transfer paper ready to apply. (The transfer paper sticks to the top of the vinyl just enough to pull it from the backing sheet.)

Once the transfer paper is down on the vinyl I press hard and rub it on good so it’ll adhere to all the tiny pieces.

Peeling back the transfer paper is best done slowly, checking to see if any vinyl doesn’t get pulled up. Occasionally you have to press it down again to grab a piece of vinyl that didn’t stick properly.

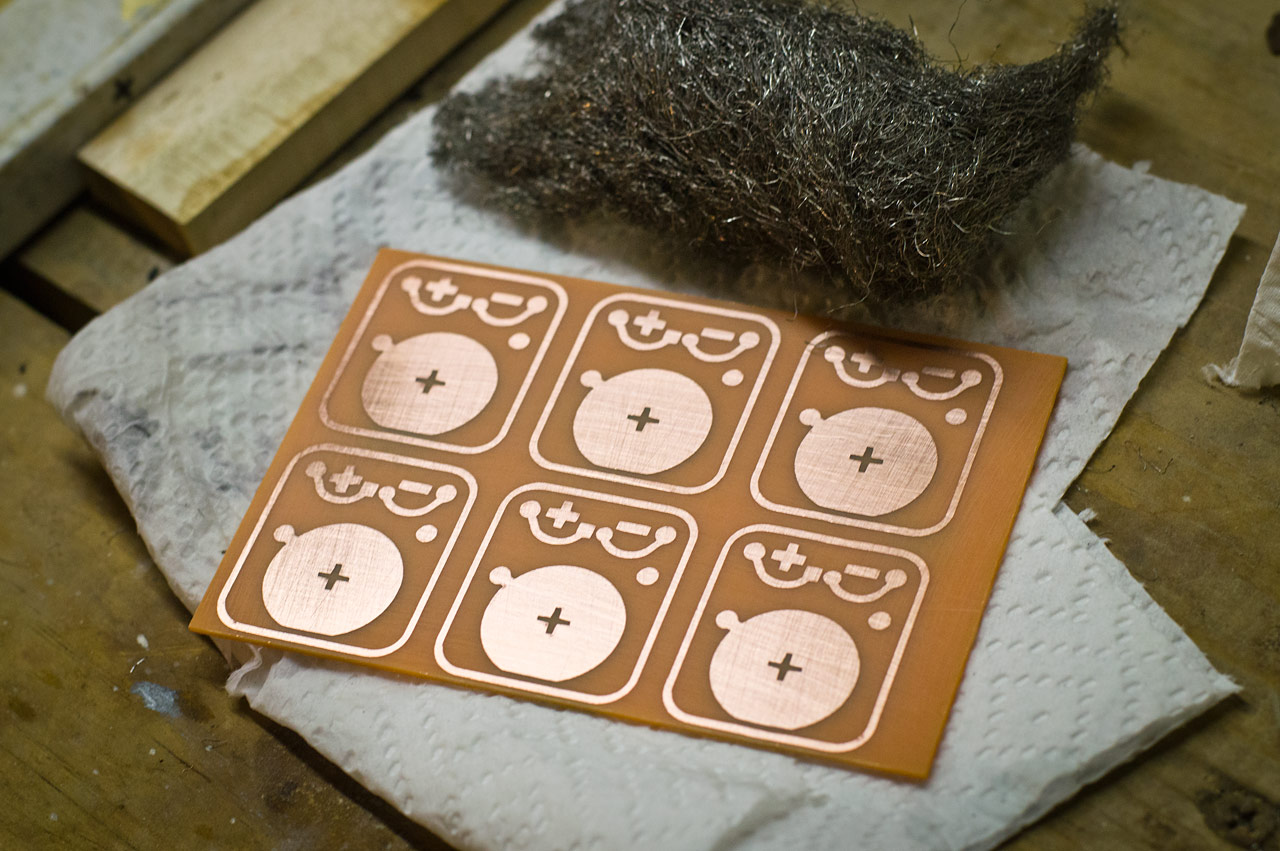
Here’s the transfer paper with all the bits of vinyl stuck to it. At this point we can stick it down onto the copper board that will be our PCB. (I usually give the copper board a light scrubbing with steel wool before sticking the vinyl on.)

Once again we press hard and rub the transfer paper onto the copper board, and then peel back slowly making sure we don’t lose any tiny bits of vinyl in the process…

And here’s our copper board with the vinyl resist in place. The vinyl works as a mask to protect the copper from being etched away. Anywhere you don’t see vinyl you won’t see copper when we are done.

Over to the PCB etching machine! It’s what we might call “janky” because I constructed it very quickly to etch some PCBs and it worked well enough that I never built a better one. I did upgrade from a servo to a DC gear motor at some point, but the bearings are still riding on smooth rods much smaller than they should be. Again, it works, so I don’t mess with it.

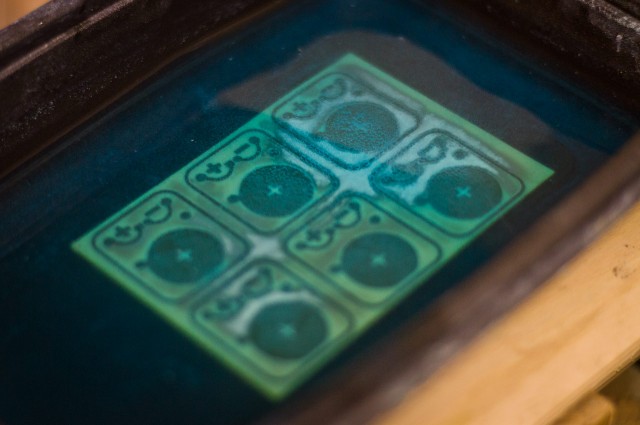
After adding equal parts hydrogen peroxide and vinegar to the tank (which is a food container from Noodles & Company) I put the copper board into the solution…

The board tends to float at first so I push it down with a brush. (I also use the other end of the brush to wipe away the solution while the board is etching.)

Yes, my chemical mix is hydrogen peroxide and vinegar, with a dash of salt. There are other things you can use, but this combo isn’t really dangerous, and can be easily disposed of by pouring down the drain with plenty of water. If I can avoid harsh acids, I will. It does take a bit longer to etch, but that’s where the salt comes in.

Once I start the agitation process to keep the board and liquid moving back and forth, I throw a bit of salt into the mix, which activates things and tends to foam up a bit. The foam means it’s working!

This is about 45 minutes into the etching process. You can see that the copper is nearly gone all around the edges, but not as much in the middle.
Here’s the 50 minute mark after adding a pinch more salt to the mix. It’s mostly etched but still has more copper to eat.

At about an hour and ten minutes the board is fully etched. Time tends to vary depending on if I reuse the solution or start fresh. I’m typically not in a hurry and tend to reuse solution a lot, which does take longer, but means I’m wasting less solution.

Once the board is done I pull it out and use a razor blade to gently remove the pieces of vinyl. They tend to come off fairly easy, but they are wet and stick to everything, including fingers, razor blades, the board, and anything else within 50mm of the work area.

After the vinyl is removed I wash and rise the board and then dry it and give it another quick scrub with steel wool.
We’ve now got a PCB, or a “Printed Circuit Board” as they are commonly known. (Somehow almost everything I do revolves around “printing” somehow…)
That covers the etching, so the next steps are to drill all the holes and to cut the boards apart.
Oh, you’ll also want to check out this mesmerizing video featuring the PCB Etching Machine in action. Agitation is the name of the game!
This is just one post in a series, check out the other posts as well:
1 reply on “Learn to Solder Kit (Part II)”
nice.
Mesmerizing, yes…
Thanks Pete for sharing!