It’s been a while so it’s time for another RepRap Report! So what’s changed since last time? So much… I’ll try to hit it all.
I got rid of the BuildTak and moved to a PEI Sheet. I upgraded to the Micro Swiss All Metal Hotend which made printing ABS reliable once again.
I repaired fans, I replaced fans. And then I did it again. Once I got ABS printing up to speed I printed a DiiiCooler, which I finally installed, and still haven’t used (since I’m printing ABS at the moment.) And yeah, I’m waiting for some new extruder fans to arrive after last night’s hurried soldering session to repair another bad fan.
If all of this seems silly, well, in a way it is, and it isn’t. When you buy a thing (be it a 3D printer or a car) you can go cheap knowing that things might break or need upgrades, or you can pay a lot more for quality out of the gate, with the hope that things don’t go wrong or are of a higher quality. I knew that getting the Monoprice Maker Select Plus meant compromising so I could afford a printer (which was replacing my old RepRap Prusa i2 kit from 2011) and I was fine with that. There are many routes you can go with a printer. I’m going the “cheap” route right now, I’ve got friends who work for the “expensive but reliable route” companies, and then there’s the custom build route. They’re all legit choices.

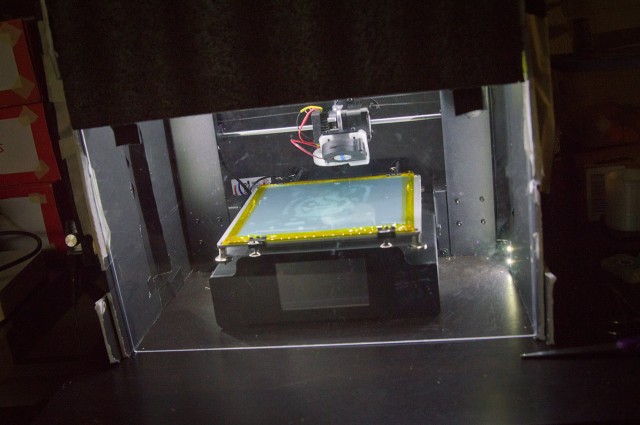
Oh, I don’t think I ever mentioned my enclosure. It’s built from foamcore board and covered with the packing foam that the printer came in. The front window is a piece of Polycarb I got from Amazon. It works. It’s not pretty. That’s okay. Besides keeping the heat in, it keeps the cats out. Also important. I also added a set of 12 volt LED lights with an on/off/dimmer switch.

If I had to build an enclosure again (and I might need to soon) I’d probably go with foamcore again, but take some effort to make it look good this time.

I still feed the filament from a metal rod hanging above my printer in the basement. It works fine. It’s not portable, and that’s probably okay. The drybox I was working on failed, and I haven’t had the energy to revisit that project. That’s okay for now.
Besides all that, I’ve been just printing things. Nothing too exciting, but that may change soon. Happy Extruding!