Categories
Uncategorized

Seeeduino Nano

The folks over at Seeed Studio sent me a Seeeduino Nano to check out. I’ve used a lot of Arduino boards over the years, including plenty of cheap Arduino Nano clones. Most of the clones have worked fine but every now and then I’ve seen a bad one come through. The Seeeduino Nano is a nice quality board with a little extra to make it useful for beginners or people more interested in making things quickly/easily than they are soldering wires.

One interesting thing about the Seeeduino Nano is that it used USB-C to connect to your computer. While most of the Arduino UNO boards I’ve used still use USB type B, and lots of other boards use Mini-USB or Micro-USB, the Seeeduino required a USB-C cable. Luckily, I had one on hand. If you don’t already have a USB-C cable, you’ll need one for the Seeeduino Nano.

My favorite part about the packaging of the Seeeduino Nano is the warning on the back that says “Best to keep away from fire”, mainly because I’ve worked on multiple Arduino projects that specifically involved fire… But I digress… for most people keeping away from fire is probably a good idea.

Here’s the top view of the Seeeduino Nano next to a ELEGOO Nano board. You can see the difference in the USB connector and a few other features. One difference with the ELEGOO boards is that they come with the header pins included but not soldered in place. (Here I’ve soldered them to the board.) There are times when you don’t want header pins solder into place. My guess is that for the target market of the Seeeduino Nano, the pins already installed makes sense.

Another thing about the ELEGOO boards is that I can’t easily find them listed on the web site. Here’s a post about them, but in the past if I’ve purchased them I’ve found them on Amazon for a price close to the Seeeduino Nano, though I’ve only seen them as a 3-pack.

(Note in the photo above the boards are the same dimensions, the Seeeduino is just on an angle due to the extra connectors on the top.)

Since I had a project already done with a Nano in place (via my Anrduino Nano Breakout Board) I just swapped in the Seeeduino Nano, uploaded the code, and it worked great.

Where the Seeeduino Nano really shines is the capabilities it has with the Grove system from Seeed Studios. If you don’t want to solder, and also don’t want to stick a lot of wires and components into breadboards, the Grove system might be what you are looking for. Again, I see this is a match for those who are more interested in the code than the wiring of electronics, or for workshops where soldering might be a concern (with kids or those not able to solder for other reasons).

In the photo above you’ll see the Seeeduino Nano along with the Grove Shield, a Temperature & Humidity Sensor, and a connector wire.

It’s also worth noting that the Seeeduino hardware and Grove system are open source, and others have embraced Grove. Adafruit has a Grove Shield for Particle Mesh and Feather Boards.

Above you’ll see the Seeeduino Nano plugged into the Grove Shield which has a Temperature & Humidity sensor attached. This takes seconds to connect versus soldering things or plugging things into a breadboard. When I taught basic Arduino classes I always told students to unplug their Arduino when they wired up the breadboard, and then to double-check the wiring for errors before plugging in the board again. The Grove plug-in system eliminates much of that guesswork. You can’t really plug things in backwards.

Here’s the Temperature & Humidity Sensor. I’ve worked with logging temperature and humidity before, so I’m not really new to this. The new part is the simplicity of just plugging things in.

I grabbed the example code Seeed Studio provided and had a few issues. Nothing I couldn’t fix, and I did open an issue about it. In the end I grabbed Adafruit’s library for the DHT Sensor as well as the Adafruit Sensor library (which is required by the DHT library) and got things up and running. If you’re not interested in downloading zip files from Github you can also install these libraries right from the Arduino IDE.

Overall the Seeeduino Nano is a good quality Arduino board, and the Grove system makes it very easy to get up and running. In this specific test I did run into some trouble with their example code, but in most cases those issues are solvable, and there’s probably an alternative example or library out there that will do what you want or need.

Finally, here’s a short video of the game scoring system I mentioned above. The Seeeduino Nano is taking input from a number of pins (that will eventually be triggered by switches or buttons) to keep score, where each pin is a different point value, and then using the piezo speaker to play a sound for each point value as well as displaying the points on a small LED display.

Categories
Uncategorized

Pizzelles

If you don’t know what pizzelles are, well… they’re delicious! Need more info? Let’s go straight to the Wikipedia:

Pizzelle are traditional Italian waffle cookies made from flour, eggs, sugar, butter or vegetable oil, and flavoring. Pizzelle can be hard and crisp or soft and chewy depending on the ingredients and method of preparation. It can be moulded into various shapes, including in the shape of cannoli.

So yeah, that’s a pizzelle. To make them you need a pizzelle press, and luckily I received one as a gift from my youngest daughter recently, so now I make pizzelles. I started making plain ones, but then learned I can make chocolate pizzelles, which are even more delicious. The nice thing about them is that they seem to last a long time and not go stale. I keep them in a container on the counter and even after two weeks they still take fresh and crispy.

Now, a plain (chocolate) pizzelle is good, but damn, you add some Nutella (or other hazelnut & cocoa) spread on top and you’ve just upped your pizzelle game a notch or two!

Pizzelles are pretty darn simple, too. Basically flour, eggs, sugar, butter and flavoring. That’s it. I tend to put them in the press for 60 seconds, remove them, let them cool for 10-15 seconds, then cut into quarters. That’s about the right size for me, but YMMV. I haven’t made waffle cones or waffle cups or cannoli shells (yet) but I’m sure that’s on the horizon.

Remember kids, Baking is Making!

Categories
Uncategorized

Enclosure Prototyping

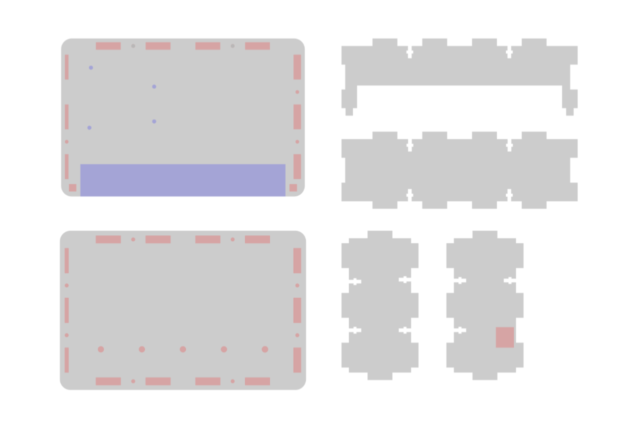
I’ve made a lot of laser cut enclosures over the years. I typically make them out of 3mm or 6mm Baltic Birch plywood, and sometimes I even mix the two sizes, which is fun because you need to remember which tabs need 3mm and which need 6mm.

As much as I’ve made a lot of enclosures, I still occasionally screw up, or get things not quite right the first time. Typically I design the entire enclosure in software and then cut things out. If I’m smart I’ll first cut it using cardboard to prototype how it all goes together. Cardboard isn’t always the correct thickness, but it can often get you close enough and reveal flaws in your design that you can correct before you start cutting wood.

One of my recent discoveries is that if your cardboard is too thick you can squish it in the hydraulic press and it’ll stay pretty squished. There’s a little bounce back, but it’ll be thinner than it was originally.

Categories
Uncategorized

New New Mac

I recently posted about my New Old Mac so it’s fitting to also mention my New New Mac. I mean, technically it’s not mine, it belongs to my employer, but I’m the one using it every day. It’s a 13″ MacBook Pro acquired in December 2019.

There are a few very striking features of this MacBook Pro. First, it is very thin, and very light. It makes my New Old MacBook Pro feel like a boat anchor. It fact, it’s almost too light. How is this even a computer!? Of course the size and weight comes at a price. When I took it out of the box I looked at it and turned it round and round and only saw Thunderbolt 3 ports. No USB, no SD card reader, no HDMI, no Mini DisplayPort… Nothing else.

So in order to use anything (that isn’t wireless) you need a dongle. Yeah, #DongleLife. It’s a little ridiculous, but as they say “everything is wonderful and terrible”. It is nice being able to use your MacBook Pro as a desktop and just unplug one thing to make it portable and go to a meeting. Of course if you need to connect to anything (that isn’t wireless) at the meeting, you’re bringing a dongle with you.

This isn’t even my full dongle setup. I added a USB cable for an Arduino and I’ve also got a USB thumb drive I use all the time. So after you buy a MacBook Pro you can get yourself a VAVA USB C Hub 9-in-1 Adapter with PD Power Delivery, 4K USB C to HDMI, USB 3.0 Ports, 1Gbps Ethernet Port, SD/TF Cards Reader along with an Anker 4-Port USB 3.0 Ultra Slim Data Hub and $75 USD later you’ve probably got the connections you need.

I suppose there are use cases where these things aren’t needed, but I connect to things all the time. Speaking of connecting to things, the other feature of the MacBook Pro is the Touch Bar. It’s a context-sensitive control that changes all the time. It’s, neat… I guess. I used it a bit at first but once I added a 4K display, and a keyboard and mouse to my setup I really don’t see the Touch Bar unless I’m using the computer at a meeting with the built-in keyboard. Speaking of keyboard, while I (mostly) love the keyboard on my old 2012 MacBook Pro, the keyboard on the super-thin 2019 MacBook Pro is a little anemic. The keys don’t have much travel, and as someone who has been typing for 40 years, I like a little travel in my keys. Of course I also realize that keyboard have become thinner and less mechanical over the years and it’s just the way things go… march of progress and all that.

So don’t take this post as a review, it’s really just personal observations. I’m sure someday I’ll get used to all the new stuff, but then again, I’m the sort of person who just purchased a serial to USB converter because I want to connect a pen plotter made in 1983 to a laptop computer made in 2012, so I’m probably an edge case…

Categories
Uncategorized

New Old Mac

So I got a new MacBook Pro… sort of. My old 2012 MacBook Pro, which I acquired in 2014, served me well. I used it almost daily, and carried it with me almost daily. Yeah, on average 5 or 6 days a week for about five years I carried this laptop with me, to work, to school, to the makerspace, and plenty of places in-between. Sure, things broke along the way, I had to repair and replace the charger a few times, I swapped out the hard drive for an SSD when the prices on 1TB dropped enough, and I moved the drive to the optical bay after the second drive connector cable failure. I think I also replaced the battery… but besides all that, it was good.

Around September 2019 I started having issues with the keyboard. Keys from T to P on the top row of letters began to work intermittently. I came up with a few workarounds including using a wireless keyboard that fit directly on top of the built-in keyboard, and yes, I did try to clean the key, but after a lot of research determined the keyboard needed replacing. You can get a replacement keyboard for fairly cheap, and it comes with the tools you’ll need to remove the 50 screws after you disassemble nearly the entire computer…

So my plan was to do this, eventually, but I had a few work commitments that required I had a working computer, and I didn’t want to start the process unless I had time to complete it, and I was short on time so… I researched replacing it, and eventually decided to get an Apple MacBook Pro 13.3-inch Laptop, Dual-Core Intel Core i5 Processor 2.5Ghz, 4GB RAM, 128GB SSD… which yes, is the same model I had, except for the RAM/SSD specs…

I got the new one, moved over my RAM and SSD, and was up and running nearly seamlessly. I miss the days when you could do this with Apple hardware. I think everyone who remembers those days misses those days. I invested in 12GB of RAM and a 1TB SSD and they worked FINE, so to just throw that away by getting a new computer that could not use them seemed stupid…

And yes, I know new computers are faster, and do more things, like… faster… but it wasn’t worth it to get a new Mac, and have to pay a premium for RAM/SSD which I have, and that work, and damn Apple, you’ve lost your way. Really. Oh, also, I’ve got USB ports, and a Mini DisplayPort, and a built-in SD card reader, and even… FireWire! This machine is fast enough for pretty much everything I do, and it was affordable, at less than one third the price of an entry level MacBook Pro with less RAM and a tiny SSD. (Upgrading to a 1TB SSD in a new Mac would up the prices $600 USD!)

But don’t worry… I’m not avoiding new Macs… in fact I’ll have a follow-up post about a new Mac!

I also discovered that the battery in the new Mac is pretty terrible, and needs replacing, which means I’ll pull the battery out of my old one and swap that as well. It’s like Ship of Theseus over here! Oh, I’m also contemplating just using the old one as a desktop, because without being portable, and using an external keyboard and mouse, it should be a decent machine.