Categories
Uncategorized

PDF to PNGs

Occasionally I need to convert a PDF file to a bunch of PNG files. If you’ve just got one page this is pretty easy to do using Preview.app on macOS. Just open the PDF, export it, choose PNG, choose the desired resolution, and you’re all set. But a multi-page PDF is a bit different, so I’ve got a tool to do it for me.

I’m not going to take much credit for this, as I found the explanation how to do it in some long forgotten forum post and ran with it. It’s basically a macOS Automator Workflow that does all the work. I just packaged it up and tossed it on GitHub as PDF to PNGs

If you find it useful, you’re welcome! If I forgot about it and find this post, congrats to past me!

Categories
Uncategorized

3D (STL) to 2D (SVG)

Back in 2015 I used Rhino to convert 3D files into 2D vector files that could be used in illustrations, instructions, etc. You can see what I’m talking about in 2D to 3D to 2D. Sadly, Rhino is not cheap, and I do not have access to it. Instead I would often do fake versions of this technique in OpenSCAD, which you can see in Enclosure Prototyping.

Well, thanks to Trammell Hudson, I can throw all that away! Checkout this post plotter.vision – STL to SVG and then go to plotter.vision and give it a spin.

The code is available on GitHub, and my favorite part is in the README:

I’m not a javascript programmer, so this is probably not very well written.

And yet… It exists, and it works. It may not be perfect, but the great thing about open source is that it can be improved by others in the future.

I’ve included a few results in this posts of things I’ve modeled in OpenSCAD. I think they turned out well and I can see using this tool in the future. Thanks, Trammell!

See Also: STL to SVG

Categories
Uncategorized

Copy Specific File Types

As I’ve been using Illustrator I’ve found it’s very common to need to reuse elements in new documents. As all of my projects consists of folders within folders many layers deep it can take a bit of time to navigate to the correct folder to find the file I need. I’d also have to make sure I either opened and old file and copied out what I needed without making any changes (or worse, damaging the document) or I would make a copy and open that, but then need to remember to delete it later.

What I wanted was a destructible copy of all my old files I could easily browse through, open, mangle, destroy, etc. with no affect on my workflow. I’ve got something that seems to work for now. (Until I come up with something better.) My original plan was to construct a Perl or Python script to walk the directory and copy any Illustrator files (with the .ai extension) to another folder named EXAMPLES. Before I got started writing code I did a few searches, first wondering if rsync could it, and it can, but it didn’t seem elegant. I ended up reading a bunch of posts about how to do this and I didn’t bookmark the page that had the closest solution, but my script is below.

#!/bin/sh

/usr/bin/find /Users/pete/Projects/ -name '*.ai' -exec cp -p \{\} /Users/pete/EXAMPLES/ \;
 
# copy just the .ai files

Difficult to read the code? See the gist on GitHub.

Yup, the good old find command to the rescue. It’s not perfect, as files might overwrite other files if the names are not unique. In this case if names are the same, it’s probably because I’ve got the same source file in multiple locations. With a bit more code I could deal with that, but again, doesn’t matter for this use case.

The nice thing about this is that I can just create a cron job to run it every night and I get all the fresh files copied into in the EXAMPLES folder ready to reference. The files are (mostly) tiny so it takes very little resources or space.

This is one of those things I’m posting because there’s a 97% chance I’ll find this useful in the future. And if anyone else finds it useful… You’re Welcome! Keep Being Awesome.

Categories
Uncategorized

STL to SVG

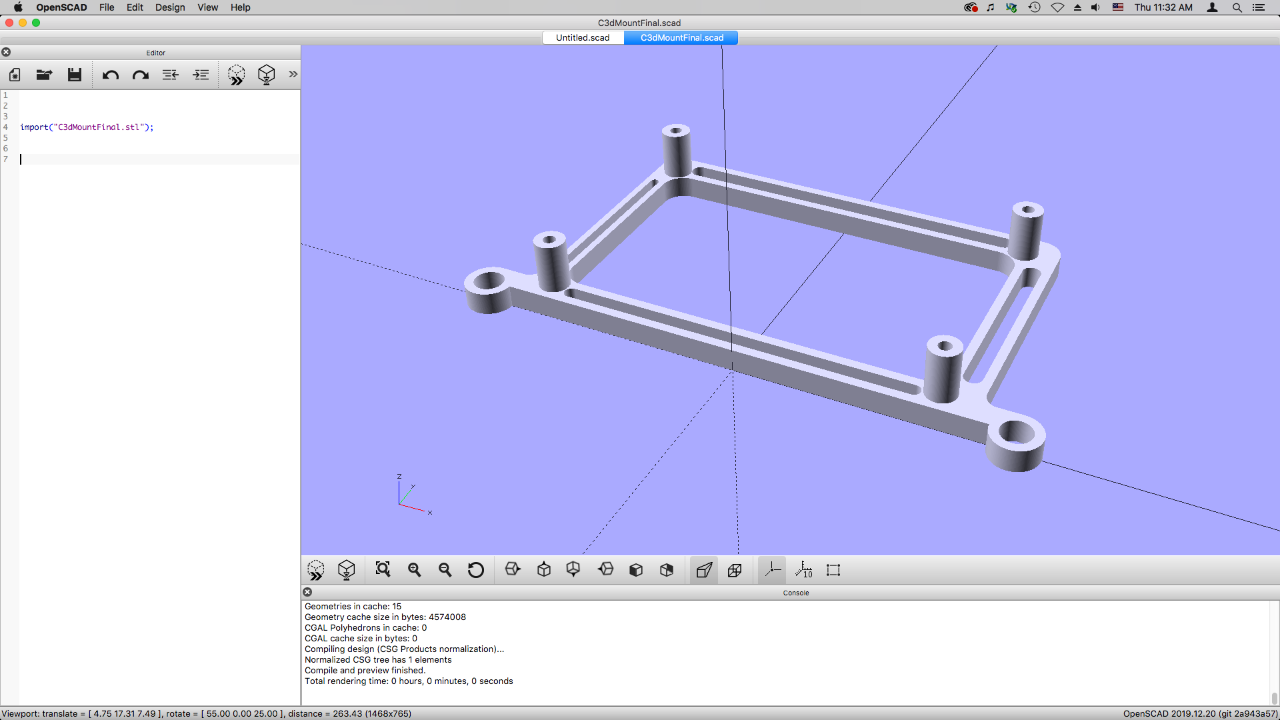
Sometimes I need a 2D vector version of something that is a 3D model. Here’s how I do it. First, if there is an STL file, I load that into OpenSCAD.

For this model I wanted a top view so I could use the hole pattern to laser cut a mounting plate.

I select Show Axes because I’m gonna need that later…

The axes will show the center of the canvas, and luckily our model is centered…

Change the view from Perspective to Orthogonal

If you don’t know the difference between perspective view and orthogonal view, do some research I guess. (I probably learned about them in 7th grade drafting class.) Otherwise, switch between the views and it should make sense…

Okay, next I view the object from the front. Looks good!

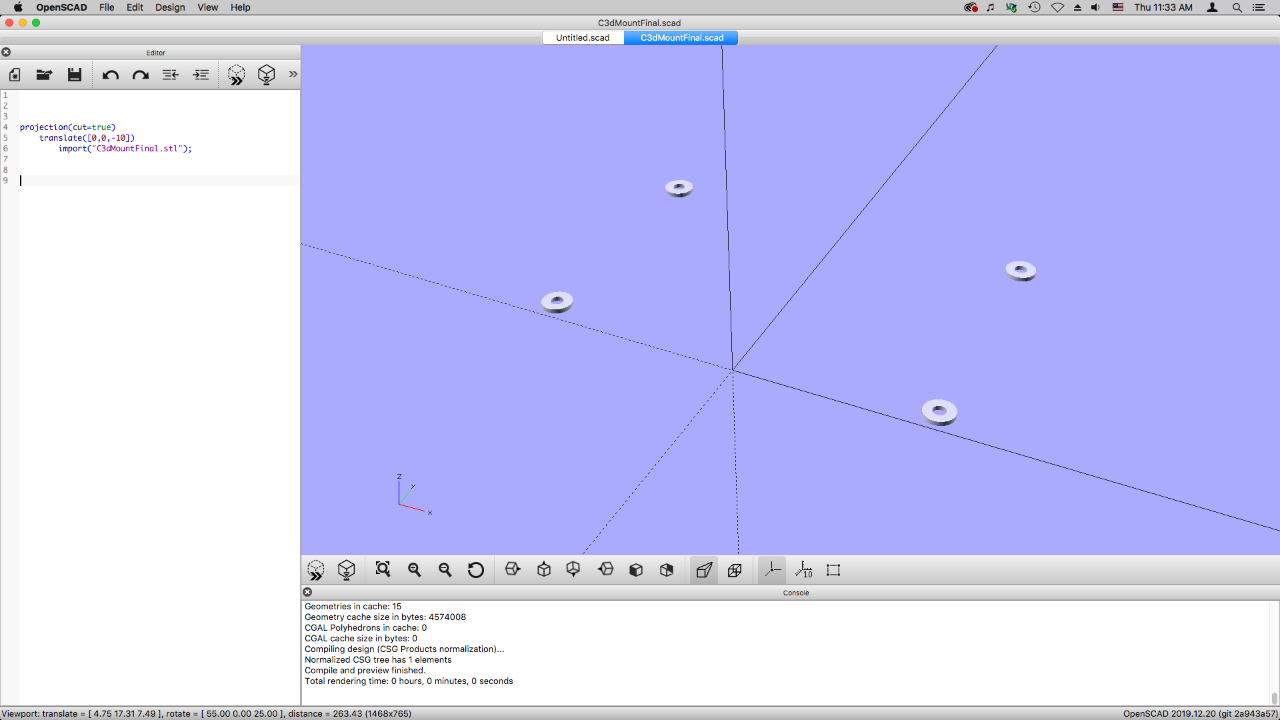
I then add the translate command so that I can move the object in 3D space, and I lower it down, in this case 10mm, because the center line is where it will be cut.

The line projection(cut=true) then cuts a slice at the zero point in the Z axis… But we’re not done yet.

(Oh, if you choose cut=false you’ll just get the whole object, not a slice at a specific cross section of it.)

Here we can see what it looks like at an angle, which might make a bit more sense…

Let’s switch from orthogonal back to perspective view… Not required, but I’ll do it anyway.

Back to the top view… and now with the projection you can see the slice we took from the 3D model.

The next step is important… we need to Render the file! You can’t export the SVG file until you render your model.

The model will change… in this case you can see the shapes are now green with red outlines.

And now we can Export as SVG. (You could also use DXF if you need to, though that’s a garbage format I tend to avoid.)

Here’s the SVG open in Inkscape. Brilliant! I can now add to it, and my hole pattern is spaced properly for the mount I want to make. Excellent.

See Also: 3D (STL) to 2D (SVG)

Categories
Uncategorized

Laser. Cut. Files. (Part IV)

It’s been a few years since I’ve posted about laser cut files, and by that I mean, the files I prepare to be used for laser cutting, so I thought I’d do an update.

Right now I typically use a few different laser cutters in the Milwaukee area. At Milwaukee Makerspace there’s a 60 watt ULS and 50 watt ULS, but using a Windows PC with CorelDraw for control, and at Brown Dog Gadgets there’s a 90 watt Chinese laser cutter using CorelDraw (and LaserCut 5.3) though it seems to be a much newer version than used at the Makerspace. I also use a 40 watt Epilog Zing at UWM’s DCRL. The Zing uses Rhino instead of CorelDraw, which may sound weird, but it works.

I’ve got a file workflow that can work with all of these machines… which I’ll explain below.

Panel Mount

Here’s what my vector art looks like in Inkscape. You’ll notice that the inside lines are blue, and the outside lines are black. This is so we can set a manual cut order for machines that don’t automatically cut inside lines first. (Some software is smart, and always makes inside cuts first, other software… is not.)

lcfiles02

I should note that while doing the design work I may end up with multiple layers. Often I’ll use layers to hold pieces or revisions of a design. For our final file though, we want a single layer.

Let’s pretend my design file is named “Panel Mount.svg”, and it has more than one layer. When I’m happy with my work, and have all the things that will be cut on one layer, I’ll save that file, duplicate it, renaming the dupe to “Panel Mount LC.svg” and then open that file. My original design file (Panel Mount.svg) is now safe and sound, but my new file (Panel Mount LC.svg) is about to get altered.

Files

I usually set all the objects to have no fill. This may not be required for all workflows, but I like to be consistent. (Oh, one more thing… you may need to “convert objects to paths” to get things to work like you expect them to in LaserCut 5.3)

Files

For the stroke I’ll set the outside lines to black… (This may be different depending on your laser cutter software.)

Files

And I’ll set the inside lines to blue. Again, this may depend on the laser cutter software & driver you use. Some allow you to set the order of colors, and some may not. If I need more colors I can use red, green, etc. (Also, if you’re working with a laser cutter operator who is colorblind, ask them what colors they prefer.)

If you want to selectively cut things and only have one color, you can use this trick: Load the file into the laser cutter software (CorelDraw, or whatever) and delete the parts you don’t want to cut, then cut. Then “undo” until all parts are back on the screen, then delete other parts, cut again, and repeat. Not the cleanest method, but it totally works. Don’t move any parts, though you may have to ungroup them, and obviously do not move the thing you are cutting.)

Stroke 0.03mm

Once I’ve applied all the colors, you can select everything and set the stroke. I set it to 0.03mm. This should set it to “hairline” when you import it into CorelDraw. Rhino also seems to do the right thing. If your stroke is too thick it can cause issues. (Always check for the lines to be set to “hairline” after you import your PDF.)

View

After you change the stroke the lines may appear very faint. If you can barely see them switch the Display Mode to “outline” which makes every stroke appear a black and sort of beefs up the lines.

At this point I run down the checklist…

  1. The file has one layer (If it had more, I duped the file and then adjusted the dupe to have just one layer.)
  2. The file has all objects set to no fill.
  3. The file has all objects set to 0.03mm stroke.
  4. The file has different colors for inside and outside cut lines.

Obviously you can do all the file prep stuff (line colors, stroke, etc.) in your master file, and then dupe that one and delete any extra layers. The order isn’t the most important thing here.

PDF Export

Once we’ve made all the changes, we can save our “LC” version of the file. After that, it’s time to use the File menu’s Save a Copy… command to save it as a PDF file. Note that “Convert texts to paths” is selected. This should create a PDF that does not rely on any fonts being installed. If you used text in your file, this is helpful. It does however mean that you cannot edit any text when you import the PDF into other software, as it will have been converted to lines.

PDF

Oh, one more thing! Some older versions of CorelDraw seem to have issues importing PDF files created in Inkscape. On Mac OS X, I just open the PDF that Inkscape created, and export it. It somehow fixes the PDF so CorelDraw likes it. Whatever… it works, so I do it!

Simple Dual Axis Solar Tracker

(BTW, the piece I used an as example was for the Simple Dual Axis Solar Tracker from Brown Dog Gadgets.)