Categories
Uncategorized

Laser Pointer Switch

Laser Pointer Switch

I modeled a laser pointer switch which you can use with your cheap laser pointer to turn it on and do stupid things like throw it in the air while doing long exposure photography. (Actually, that’s not a bad idea! Or is it?)

Laser Pointer Switch

OK, these are really part of the Laser Maze we’ll be running at Maker Faire Milwaukee this year. The last thing I did for Laser Maze was the mounts, but Vishal is still doing most of the hard work on this project. (Thanks, Vishal!)

Laser Pointer Switch

If you want one, you can grab it from Thingiverse or Youmagine. And remember kids, laser are dangerous, don’t just go pointing those things around!

Laser Pointer Switch

Categories
Uncategorized

Laser Maze Mounts

My plan for Maker Faire Milwaukee’s 2015 Laser Maze got a little sidetracked, but that’s okay, because Vishal ended up writing some of the code I needed for another project and then I decided to just have him take over the some of the build.

Laser Holder

I did get a few more things done in recent weeks, like making these mounts to hold the lasers in place. Adam provided us with these clamp devices meant to hold a flashlight on your bike, but the lasers are a smaller diameter and tended to shift around, which isn’t great when you need to align lasers…

In our first attempt to make something that would go into the flashlight mounts and adapt to the size of the lasers, we ran down to the basement shop at the museum and used a hole saw in the drill press to cut a piece of plastic, and then we drilled another hole, and cut out a piece using the band saw. This was a neat idea, but did not work.

Laser Holder

The hand-fashioned one just wasn’t quite the right size. We didn’t have the exact hole saw or drill bit sizes needed, and the plastic just didn’t flex enough to allow for tightening. I ended up pulling out the calipers to get exact measurements and re-create what we tried to do with 3D printing.

Laser Holder

The 3D printed version sort of worked, but it was tough to slide the laser into place. I could have just kept trying to get the perfect fit, but instead of trying to emulate the limitations of using a drill and saw, I modified the design to have less surface area where the laser was sliding in, and also allow for more flex, and more strength, due to the way 3D printing works.

Laser Holder

These pieces don’t have a lot of infill, and they don’t need them. The shape of the interior section provides extra strength because of the nature of how it’s structured.

Laser Holder

These mount should work well, and the bike flashlight part saves me the trouble of creating an entire mounting system, or modifying previous mount work.

We’ve got less than 90 days until Maker Faire Milwaukee so hopefully we can get a test set-up running within the next 30 days or so.

Categories
Uncategorized

Lasers to San Mateo

Road to Maker Faire

Remember my Laser Kaleidoscope project? Well, I entered into into the Road to Maker Faire contest, and now I need your vote!

Help send me (and my laser!) to the Bay Area Maker Faire. Use the big bold button below to vote for my project. (You’ll need a Facebook account, but 98.483% of people who use the Internet seem to have one.)

But why should you vote for me? I’d like to explore making this thing into a kit that would teach people about things like basic electronics, lasers, engineering, and fun. I’m hoping a visit to Maker Faire will give me the opportunity to talk to knowledgeable people and learn more about building it into an actual kit you could purchase and build yourself. That’s the plan!

So yeah, vote… vote now, not later. And then ask your friends to vote. Did you vote yet? Thanks! I appreciate it!

Vote Now!

Note: Voting is over! Thanks to everyone who voted for me… now we wait!

Categories
Uncategorized

Laser Kaleidoscope

Laser Kaleidoscope

We managed to get Milwaukee Makerspace invited to another gallery night, and this time we’re taking part in Bay View Gallery Night at Alterra, so I figured I needed a new project. And hey, what’s better than a deadline to get a project done? (It’s like college all over again… in a good way!)

Interociter

When I was at Maker Faire Detroit back in July I saw this laser spinner thingy called “The Interociter” and decided I had to have one. And by “have one” I mean “make one”… so I did.

(There’s some debate over whether it should be called a “Laser Kaleidoscope” or “Laser Spirograph” or “Laser Spinner Thingy” and while I do like “Laser Spinner Thingy” I also get sick of people thinking all my projects are Spirograph-inspired, so I went with Laser Kaleidoscope. Deal with it.)

Laser Kaleidoscope

Laser Kaleidoscope

So where were we? Oh yes, the project! It’s really simple: a laser is pointed at a mirror, and that reflects the laser onto another mirror, and that one reflects it onto another mirror, and then it shows up on the wall. You can make the motors spin by turning them on with a pushbutton, and then adjust the speed by turning the knobs. There are 3 motors (an earlier prototype had 4) and by setting them all to different speeds, you can get some crazy patterns going.

So how does it work? The laser hits the first spinning mirror, and creates what appears to be a circle. It’s really a single dot, but it’s spinning around so fast it looks like a circle. Add a second (and third) mirror, and since they all wobble just a little bit, you get much more than a simple circle.

Here’s a shopping list:

I say “shopping list” because those are the parts I (mostly) bought… Of these parts I’ll note that with the laser I leaned towards the “safe” side, but it can be difficult to see in well-lit rooms, so I may upgrade to this one at some point. The round craft mirrors came in a variety pack with different sizes. I may experiment with larger mirrors in the future.

Laser Kaleidoscope

Laser Kaleidoscope

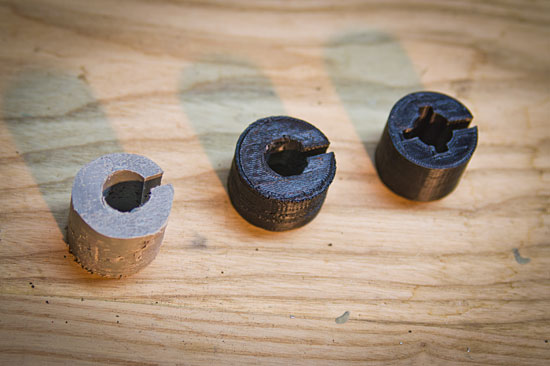
There are a bunch more parts involved, one being the piece of wood everything is attached to, and the other parts were all designed and 3D printed by me. (OK, I had a little help with the knobs.)

The printed parts are:

  • (1) Laser mount
  • (3) Motor mounts
  • (3) Mirror mounts
  • (3) Knobs

(I also considered printing some small U-shaped things to hold the wires in place, but haven’t bothered with that yet.)

And yeah, this is why I have a 3D printer. The ability to digitally design something, rapidly create it, tweak it a bit and print a new one… that’s what I love.

My original plan was to make up a nice laser-cut case for this (I thought that would be appropriate) but with the lasers down for repair, I didn’t get that done in time. That’s actually fine, as I’ll probably end up redesigning things a bit before I’m totally done with it. So far though, I’m happy with the progress.

The video was quick & dirty, and really doesn’t do it justice, which is why you’ll need to come see it in person I guess. I figured I couldn’t write this post without including some sort of proof that it actually works. :)

Lasers! They’re awesome!

Categories
Uncategorized

Laser. Cut. Wood. (Part II)

Laser Cut Box

In our last adventure cutting wood we had success! And it was good… So I decided to try the awesome BoxMaker again and I’m pleased with the result as compared to the previous attempt.

Above you’ll see the template I created from BoxMaker with a light bulb on one of the faces. I got the original bulb from OpenClipArt and tweaked the SVG file in Inkscape until I was pleased with it. (I may still need to adjust a few of the thinner areas, but I definitely like it.)

Bulb Box

In the next image you can see the results of the cut. This is using 3mm Baltic Birch plywood, which I highly recommend for the 25 Watt Laser Cutter that Milwaukee Makerspace has.

There’s actually one extra piece in the lower center which you’ll notice has straight lines, and is not part of the box, but this is the interesting part…

One thing about using the laser cutter is determining what settings to use. For this cut I used 100% power with 3.2% speed. It takes a few passes to complete the cut (maybe 4 or 5) but it works. I found that at slower speeds there is a higher risk of flames (which are bad!) and you can char the wood a bit too much. I actually didn’t care about the charring as I will be painting this box, but if you want less charring, up the speed a little bit, and know that you will need more passes.

Burninator

Oh yeah, the interesting part! In the image above, I’ve highlighted two areas. In the bottom red rectangle you’ll see a lot more charring. This is due to the long straight line that the laser cutter follows when cutting. I noticed that the notched areas, with lots of small short lines, had much less flame, while the long continuous lines had a lot more flame. (It was still within an acceptable amount of flame, but this is why I didn’t want to go lower than 3.2% for the speed.)

So I’m definitely calling this one a success, if only due to the fact that I’m pretty certain I’ve got good settings to use when cutting 3mm Baltic Birch plywood.

Also, lasers are awesome!